
Going live on Facebook is simpler than you might think. All you really need is a device with a camera—like your smartphone or laptop—and a solid internet connection. Whether you're broadcasting on the move or producing a polished show from your desk, the platform gives you the tools to connect with people in the moment.
Why Facebook Live Is Such a Big Deal for Engagement
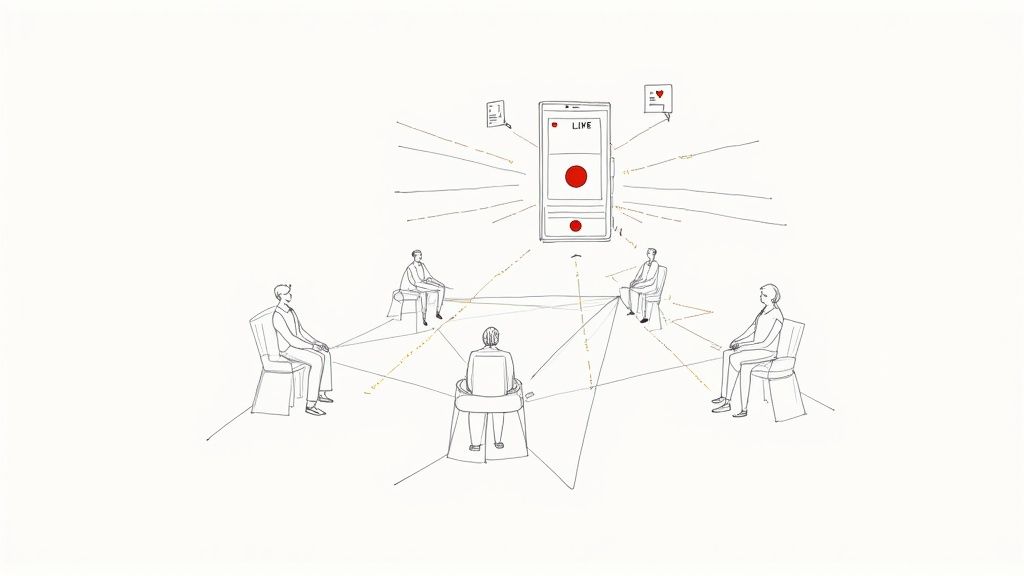
Sure, pre-recorded videos are great, but a live stream offers something they can't: an authentic, unscripted connection with your audience. It turns passive scrolling into an active, shared event. There’s an immediacy to live video that just pulls people in.
Imagine a small business owner launching a new product. A slick, pre-made ad is one thing. But a live Q&A where the founder is answering questions straight from the comments? That builds genuine trust and excitement. This is the real power of going live—it shrinks the distance between you and your community.
To help you decide which approach is right for you, here’s a quick rundown of the most common methods.
Facebook Live Streaming Methods at a Glance
| Method | Best For | Key Feature |
|---|---|---|
| Mobile App | On-the-go, spontaneous streams, and quick updates. | The fastest and easiest way to go live from anywhere. |
| Facebook Live Producer | Professional desktop streams using a webcam or encoder. | Offers more control over your stream, like adding graphics. |
| Simulive (Pre-recorded) | Polished presentations, webinars, and product launches. | Broadcast a perfect video while engaging with comments live. |
Each method has its place, and the best one really depends on what you’re trying to accomplish with your stream.
The Power of Real-Time Interaction
The real magic of a live stream on Facebook is the back-and-forth. When viewers can comment, ask questions, and drop reaction emojis—and you can respond to them right away—it feels like a real conversation. That two-way dialogue makes your audience feel heard and valued, which is huge for building a community.
Think about a fitness instructor leading a live workout. When they give shout-outs to people by name, it creates a personal connection that keeps them coming back.
This instant feedback loop is incredibly useful. It allows you to:
- Get immediate reactions to new ideas or products.
- Answer questions on the spot, clearing up any confusion.
- Build a loyal following by making people feel like part of the show.
The numbers back this up, too. Engagement on Facebook Live is off the charts compared to regular videos. People are far more likely to tune in for a live broadcast and are four times more likely to interact with it.
Using Simulive for a Perfect, Stress-Free Broadcast
Let's be honest, the pressure of a live event can be intense, especially for something important like a detailed webinar or a big company announcement. One wrong click or a spotty connection can derail everything. This is exactly where "simulive" comes in.
Simulive means you broadcast a pre-recorded video as if it’s live. You get to perfect your content ahead of time—adding professional graphics, editing out mistakes, and ensuring the audio is crystal clear. All the polish, none of the live-broadcast panic.
With a tool like Pre-recorded LiveStream, you can schedule your perfected video to go live at a specific time. This frees you up to hang out in the comments and chat with your audience in real time. It's the ultimate hybrid approach, giving you the flawless quality of a recorded video with the dynamic engagement of a live event.
Broadcasting Instantly from Your Mobile Device
Sometimes, the best moments are unplanned. Going live straight from your phone is easily the fastest way to connect with your audience, turning spontaneous ideas into engaging content. The Facebook mobile app essentially puts a broadcast studio in your pocket. It's perfect for those impromptu Q&A sessions, giving a behind-the-scenes tour, or capturing the raw energy of an event as it unfolds.
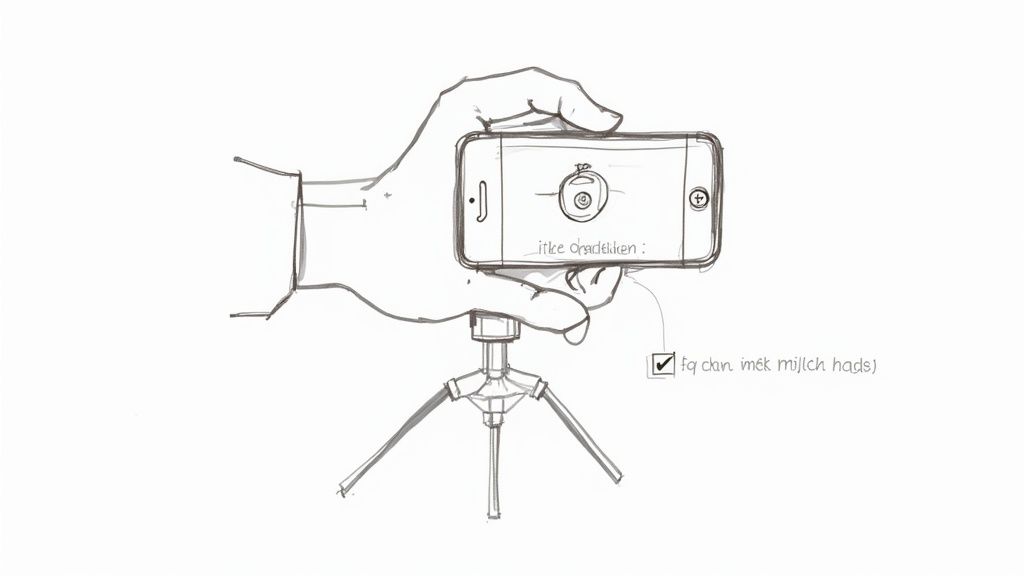
No fancy equipment needed here—just your phone and something to share.
To kick things off, just open your Facebook app. Tap the "What's on your mind?" box at the top of your feed, then select the "Live video" option. Facebook designed this for speed, letting you jump from a fleeting idea to a live broadcast in just a few seconds.
Setting Up Your Mobile Stream
Before you hit that big "Go Live" button, pause for a second. The most important thing you can do is write a compelling description. Think of it as your headline—it's what will make someone stop scrolling and tune in. A good description teases the topic and gives people a reason to watch.
Next, double-check your audience settings. You can broadcast publicly, to just your friends, or even to a specific custom list. If you're managing a brand Page, this is where you confirm you're posting to your Page's followers and not your personal profile. It’s a small step, but a crucial one for making sure your stream lands in front of the right eyeballs.
The mobile interface gives you a quick preview and a few simple controls before you start.
Think of this screen as your pre-flight checklist. It lets you finalize your description, confirm your audience, and even add interactive elements like polls or tag a location.
Pro Tips for Mobile Broadcasting
Even a simple phone stream can look surprisingly professional with just a little prep. Your two biggest priorities should always be stability and quality. A shaky camera is incredibly distracting for viewers, so at a minimum, prop your phone up against something solid. An inexpensive tripod is even better.
Here are a few more tips I’ve learned over the years to make your mobile broadcasts shine:
- Test Your Connection: A strong Wi-Fi signal is your best friend. It’s almost always more reliable than cellular data. If you have to use mobile data, make sure you're in an area with solid 4G or 5G coverage to prevent your stream from getting choppy or dropping altogether.
- Find the Light: You don’t need a fancy lighting kit. Just find a window and face it. Natural light is soft and flattering, and it will instantly improve your video quality. The one thing to avoid is having a bright light source behind you, which will turn you into a dark silhouette.
- Talk to Your Audience: The real magic of mobile streaming is the intimacy. As people join, give them a shout-out by name. When questions pop up in the comments, answer them in real-time. This direct interaction is what builds a dedicated community.
Remember, people watch mobile live streams for authenticity, not for Hollywood-level production. A stable, clear video with genuine interaction will always outperform a technically perfect but impersonal broadcast. Don't stress about being flawless; focus on being present.
Using Facebook Live Producer for Polished Broadcasts
So, you've mastered going live from your phone, but now you're ready to level up. When it's time to move beyond spontaneous streams and create a more professional, planned-out broadcast, Facebook Live Producer becomes your new command center.
Think of it as the mission control for your live stream on Facebook. It's the desktop dashboard that gives you serious control over your broadcast. This is where you'll hook up external cameras and software, schedule your events, and manage all the behind-the-scenes details that make for a truly polished viewer experience.
Unlike the simple "Go Live" button in the app, Live Producer is built for intentional, high-quality streams. It's the gateway for connecting better webcams or even DSLRs, integrating powerful streaming software like OBS Studio, and adding professional graphics. This is the setup you want for webinars, expert interviews, product launches—any event where quality and reliability really matter.
Connecting Your Streaming Software
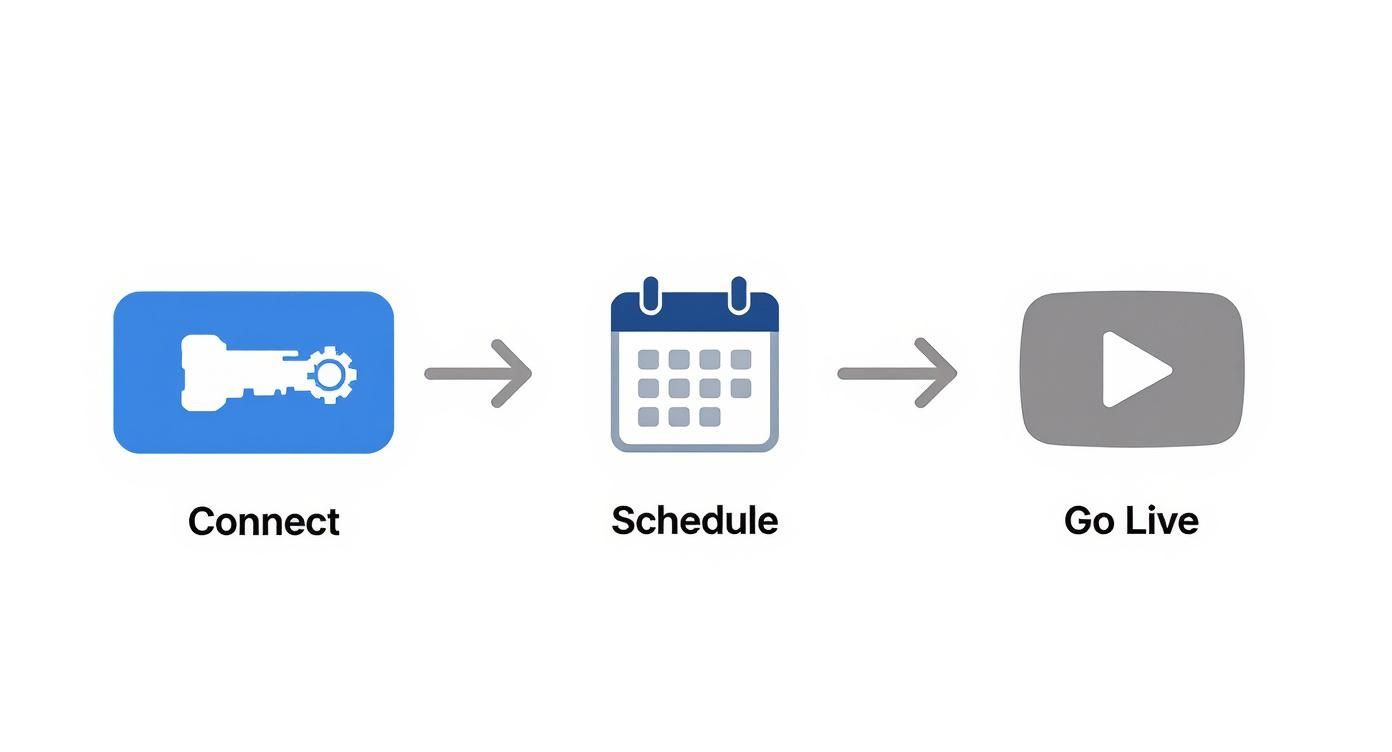
First things first, you need to tell Live Producer where your video is coming from. While you can use your computer's built-in webcam, the real magic happens when you choose the "Streaming software" option. Selecting this generates a unique stream key.
What's a stream key? It’s essentially a password for your broadcast. You just copy this key from Facebook and paste it into your streaming software (like OBS, Streamyard, or whatever you prefer). This creates a secure, direct link, telling your software exactly where to send the video feed. It’s a simple copy-and-paste that unlocks a ton of creative power.
Your stream key is the ticket to a much richer broadcast. Instead of being stuck with a single webcam view, you can now mix multiple cameras, pop up graphic overlays, share your screen for a presentation, or even roll pre-recorded video clips—all managed from your external software.
Scheduling Your Stream to Build Hype
One of the most powerful features in Live Producer is the ability to schedule a live stream ahead of time. Don't just pop up unannounced! Instead, you can create an announcement post that lives on your Page or Group, complete with a countdown timer. This one simple step transforms your stream from a random interruption into an anticipated event.
Here’s why scheduling is a game-changer:
- You can build an audience in advance. People see the post and can click "Get Reminder," which pings them right before you go live.
- It makes promotion a breeze. You get a unique link to share in your email newsletters, on other social media platforms, or even in paid ads.
- It gives you a deadline. Having a set time helps you get your act together—finalizing your slides, prepping your talking points, and making sure everything is ready to go.
Translating Technical Settings for a Stable Stream
Live Producer also gives you a real-time health report for your stream, both before you start and while you're live. You'll see some technical terms like bitrate and resolution, but don't let them intimidate you. They're actually pretty straightforward.
- Resolution: This is just your video’s clarity. Think 720p vs. 1080p. For Facebook, 1080p is the gold standard if you want a sharp, professional look.
- Bitrate: This is how much data you're sending every second. More data usually means better quality. Facebook recommends a video bitrate between 3,000 and 6,000 Kbps for a solid 1080p stream. A good starting point is around 4,000 Kbps, but a crucial tip is to make sure this number doesn't exceed about 80% of your internet's total upload speed to prevent buffering and lag.
By getting comfortable with Live Producer, you're not just going live anymore. You're producing a show.
Integrating OBS Studio for Full Creative Control
When you're ready to move beyond a simple webcam stream and produce a truly custom live show, OBS Studio is your best friend. This free and incredibly powerful software essentially turns your computer into a live production studio, giving you the power to mix multiple cameras, screen shares, and graphics into a single, polished broadcast.
This is how the pros do it. Think of OBS as a digital mixing board for video. You can set up different "scenes"—maybe one for your main camera, another for a screen share with your webcam in the corner, and even a pre-recorded intro video. During your broadcast, you can switch between these scenes with a single click. This is the standard setup for everyone from gamers showing off gameplay to educators presenting slides and creators hosting professional-looking talk shows.
The magic happens by connecting OBS to Facebook Live Producer using that stream key we covered earlier. All you do is tell Live Producer you're using streaming software, copy the unique key it generates, and then paste it right into the "Stream" settings in OBS. It's a surprisingly simple process that opens up a world of creative possibilities.
Building Dynamic Scenes in OBS
The real power of OBS lies in its "scenes." A scene is just a specific layout of your sources (like cameras, images, and text) that you can flip to at any moment. This is what separates a static, one-camera stream from a dynamic and engaging show.
Here are a few essential scenes most streamers build to get started:
- Starting Soon Scene: This is great for building hype. Think a countdown timer, some cool background music, and a graphic with your show's title.
- Main Camera Scene: Just you, full-screen. Perfect for your introduction and any time you're speaking directly to your audience.
- Screen Share Scene: This is your desktop or a specific application, usually with your webcam feed tucked neatly in a corner so your audience can still see you.
- Guest Scene: Hosting an interview? This scene lets you create a side-by-side layout showing both you and your guest's video feeds at the same time.
Once you get the hang of it, the workflow of connecting OBS, scheduling your stream, and going live becomes second nature.
This process really drives home the point that the technical setup is just the beginning. To turn your broadcast into a real event, you need to schedule and promote it effectively.
Optimal Settings for a Stable Facebook Stream
Getting your settings dialed in is absolutely critical. It’s the difference between a smooth, professional stream and one that's constantly lagging or dropping frames. While OBS has a ton of options, you only need to focus on a few key settings to get a high-quality, stable stream to Facebook.
With viewership on Facebook Live having grown by 50% in a single month in early 2020, delivering a quality experience is more important than ever. Plus, research shows that longer live videos—at least an hour—see their engagement rates nearly double. A stable stream is non-negotiable for that kind of performance. If you want to dive deeper into the data, you can discover more insights about Facebook Live statistics.
To help you get started, here's a quick reference table with the ideal settings for a solid 1080p stream.
Recommended OBS Settings for Facebook Live
| Setting | Recommended Value (1080p) | Reason |
|---|---|---|
| Encoder | NVIDIA NVENC H.264 (new) or x264 | NVENC uses your GPU, taking the load off your CPU. Use x264 (CPU) if you don't have a modern NVIDIA card. |
| Rate Control | CBR (Constant Bitrate) | Provides a consistent, stable data flow that prevents buffering on the viewer's end. |
| Video Bitrate | 4000-6000 Kbps | A good balance for 1080p at 30/60fps. Critically, this must be less than 80% of your internet upload speed. |
| Keyframe Interval | 2 seconds | Facebook requires a 2-second keyframe interval for optimal stream processing. |
| Preset | Quality (NVENC) or veryfast (x264) | These presets offer a great compromise between visual quality and performance demands. |
| Audio Bitrate | 128 Kbps | This is the standard for clear, high-quality stereo audio without using excess bandwidth. |
Sticking to these settings will solve most of the common streaming problems right out of the gate.
The most common mistake new streamers make is setting their video bitrate too high for their internet connection. Your stream's stability is only as good as your upload speed.
Here’s a practical rule of thumb: your video bitrate should never exceed 80% of your stable upload speed. If a speed test shows you have 5 Mbps upload (which is 5,000 Kbps), setting your bitrate to 4,000 Kbps is a safe bet for a high-quality 1080p broadcast. That 20% buffer gives your connection room to breathe, absorbing any small dips in your internet speed so your viewers never see a choppy, frustrating feed.
Using Pre-recorded Video for a Flawless Live Event
What if you could get all the real-time buzz of a live broadcast without the "anything-can-happen" stress? That's the idea behind "simulive"—broadcasting a pre-recorded video as if it’s live. This brilliant trick takes all the usual live-streaming anxieties off the table. No more worrying about a shoddy internet connection, a mic cutting out, or stumbling over your words.
Instead, you get to create a perfectly polished video on your own time. You can edit out any mistakes, nail the pacing, add professional graphics, and ensure the audio is crystal clear. It's the perfect strategy for a big product launch, a detailed tutorial, or any major announcement where you simply can't afford a technical hiccup. You get the best of both worlds: polished production and live engagement.
Why Go with a Simulive Broadcast?
The real genius of the simulive method is what it frees you up to do. While your flawless video is playing for your audience, you're not stuck in front of the camera. You can be right there in the comments section, engaging with your viewers in the moment.
This is your chance to answer questions as they pop up, welcome people by name, and build a real sense of community. It creates a far more interactive and personal experience than a standard video premiere ever could. Your audience feels seen and heard, which is a huge driver for loyalty. For a deeper dive, check out our guide on live video versus pre-recorded streams.
The core benefit is simple: you trade the risk of a live broadcast for the reliability of a pre-recorded video, all while maintaining the crucial element of live audience interaction.
This approach is incredibly powerful on a platform like Facebook. Data shows that a massive 42.6% of live stream viewers worldwide use Facebook Live, making it a key player in the social streaming scene. The audience there also skews a bit older, particularly with users aged 35 and up who really appreciate well-produced, professional content. You can find more live streaming platform statistics to see how the landscape breaks down.
A Typical Simulive Workflow
Pulling off a simulive broadcast is probably easier than you think. It boils down to a few straightforward stages that take you from initial idea to engaging with your live audience.
Here’s a look at the typical process:
- Create and Polish Your Video: This is where you record and edit your content until it’s perfect. Add your intro music, lower-third graphics, and any other professional touches you want.
- Upload to a Simulive Platform: Next, you’ll use a dedicated service like Pre-recorded LiveStream to upload your finished video file. These tools handle all the technical heavy lifting on the backend.
- Schedule Your "Live" Broadcast: Pick the exact date and time you want your video to go live on Facebook. This automatically creates an announcement post on your Page, which helps build anticipation.
- Engage Live in the Comments: When your scheduled time hits, the platform starts streaming your video automatically. Your only job is to be active in the comments, interacting with viewers as they watch.
This workflow transforms what could be a high-stress event into a controlled, engaging, and high-impact experience for your community.
Common Questions About Facebook Live Streaming
Jumping into Facebook Live for the first time? It's totally normal to have a few questions, especially once you move past just hitting the 'Go Live' button on your phone. Getting the right answers upfront can save you a lot of headaches later on.
I've pulled together some of the most common questions I hear from streamers. Think of this as your go-to FAQ for getting the technical and practical details sorted.
What Is the Best Bitrate for a Facebook Live Stream
The sweet spot for bitrate is all about finding a perfect balance between high-quality video and what your internet connection can actually handle. For a smooth 1080p stream at 30 frames per second, Facebook suggests a video bitrate somewhere between 3,000 and 6,000 Kbps. For most people, landing right in the middle at 4,000 Kbps is a solid place to start.
Here's the golden rule, though: your bitrate should never take up more than 80% of your total upload speed. That extra 20% acts as a critical buffer to prevent dropped frames and that dreaded lag your viewers hate. As for audio, a standard 128 Kbps bitrate will give you clean, crisp sound every time.
Can I Play Music During My Facebook Live Stream
This is a huge one, and the answer is surprisingly simple: you absolutely must have the rights to any music you play. If you use copyrighted tunes without a license, you're risking having your stream's audio muted or, even worse, having the entire broadcast shut down by Facebook's Rights Manager system. It happens automatically, and it's not fun.
To keep your stream safe, stick with these options:
- Royalty-Free Music: Look into services like Epidemic Sound or Artlist, or even browse Facebook's own Sound Collection.
- Original Music: If you wrote it and performed it, you're clear to use it.
- Explicit Permission: This means getting a direct license or written permission from the person who owns the copyright.
How Can I Improve Engagement During My Broadcast
Engagement is what makes a live stream special—it's the difference between a broadcast and a conversation. The real magic happens when you make it feel interactive. I always recommend promoting your stream ahead of time so you have an audience waiting for you the moment you go live.
During the broadcast itself, make a point to greet people by name as they join. A quick shout-out makes viewers feel included and far more likely to stick around. Ask your audience questions to get the comments rolling, and be sure to read and respond to them on air.
Don't forget to use built-in tools like polls and Q&As, which are fantastic for boosting interaction. And always, always wrap up with a clear call-to-action. Tell people exactly what you want them to do next, whether it's checking out your website or following your Page. For more in-depth content strategies, feel free to check out the articles on our blog.
What Happens to My Video After the Live Stream Ends
Don't worry, all your hard work doesn't just vanish when you hit the "End Live Video" button. The full recording is automatically saved and published right to the Facebook Page, Group, or Profile you streamed to, instantly turning your live event into on-demand content that people can watch later.
Once it's posted, you can go back and polish it up. You can edit the description, add a custom thumbnail to grab more attention, and even trim out any awkward bits at the beginning or end. This is also when you get access to all the juicy performance analytics in Creator Studio, letting you see exactly what resonated with your audience.
Ready to create flawless, professional live events without the stress? Pre-recorded LiveStream lets you broadcast perfected videos as live events, so you can focus on engaging with your audience in the comments. Upload, schedule, and go live with confidence. Find out more at https://prerecordedlivestream.com.