The simplest way to start saving your streams on Twitch is to flip a switch in your Creator Dashboard. By enabling the "Store past broadcasts" feature, Twitch will automatically archive your live content as VODs (Videos on Demand).
It's a straightforward first step, but how long those VODs stick around depends entirely on your account status.
Why Saving Your Twitch Streams Matters
Saving your streams isn’t just a technical checkbox—it's a foundational part of growing your channel. When you archive your broadcasts, you’re building a content library that works for you 24/7. It's your ticket to reaching viewers in different time zones or anyone who just couldn't make the live show.
Think about it this way: your live broadcast is for the immediate audience, but your VODs are for everyone else. This is how you build a global community and give new followers a reason to binge-watch your content and stick around.
Expanding Your Reach Beyond Live Viewers
The biggest win from saving your streams is accessibility. Not everyone can be there the second you hit the "Go Live" button. VODs open your content up to:
- Viewers in Different Time Zones: That late-night stream in North America can be the perfect morning coffee viewing for someone in Europe.
- Fans with Busy Schedules: Life happens. VODs let your community catch up when they have the time, not just when you do.
- New Followers: When someone new discovers your channel, a solid library of past streams gives them an instant reason to subscribe.
All of this adds up to more watch time and engagement, which are exactly the signals the Twitch algorithm loves to see.
A common mistake new streamers make is treating their broadcast as a fleeting event. Top creators understand that the real work begins after the stream ends. Every VOD is an opportunity for new discovery and community growth.
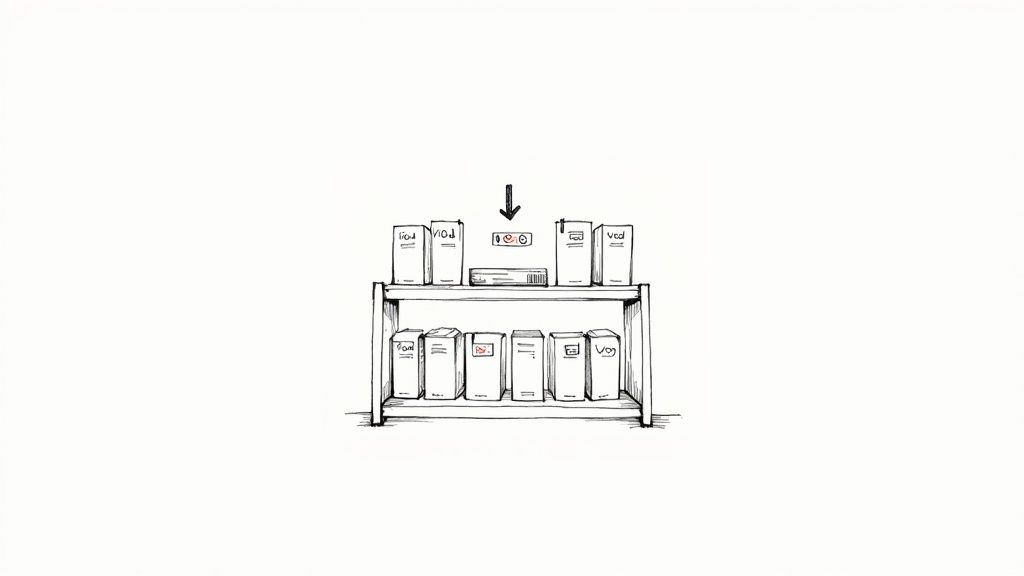
Understanding Twitch VOD Storage Limits
Twitch does save your past broadcasts automatically once you've enabled the feature, but that storage is temporary. The time limit depends entirely on what kind of account you have.
Here’s a quick breakdown of how long your VODs will stay on Twitch before they’re automatically deleted.
Twitch VOD Storage Limits by Account Type
| Account Type | VOD Storage Duration |
|---|---|
| Regular User | 14 Days |
| Twitch Affiliate | 14 Days |
| Twitch Partner | 60 Days |
| Amazon Prime User | 60 Days |
| Twitch Turbo User | 60 Days |
As you can see, regular streamers and Affiliates only get 14 days. In contrast, Partners, Turbo users, and Prime Gaming members get a much more generous 60-day window. This difference is precisely why having an active content management strategy is so important for preserving your best moments. If you want a deeper dive, you can explore more Twitch statistics to see how these features shape creator strategies.
Enabling VODs Inside Your Twitch Dashboard
So, you're ready to start saving your broadcasts? The very first thing you need to do—and this is a big one—is to flip a switch inside your Twitch account. Activating the Video on Demand (VOD) feature is the fundamental step that tells Twitch to automatically archive your streams every single time you go live.
Let's get this handled. You’ll need to head over to your Creator Dashboard. Think of this as your channel's command center. The interface can look a little overwhelming at first, but the setting we need is only a few clicks deep.
From the dashboard, find the Settings menu on the left and click into the Stream section. This is where all the magic happens for your live broadcasts, including the key to unlocking your stream archives.
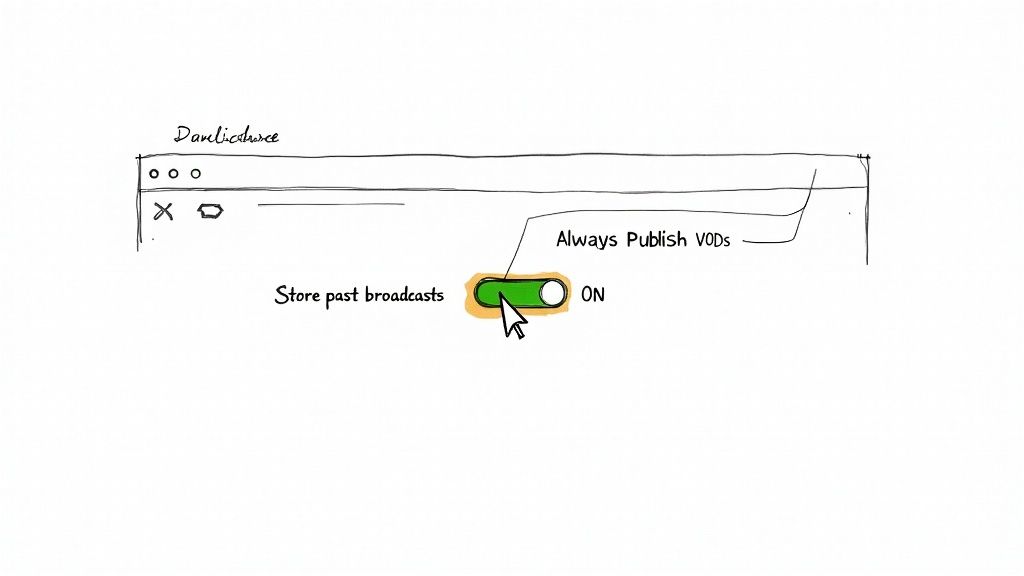
Finding the VOD Storage Toggle
Once you're in the Stream settings, just scroll down a bit until you see the "VOD Settings" area. The option you're looking for is a simple toggle switch labeled Store past broadcasts. This is the master switch. Turning it on tells Twitch to start saving your streams from this point forward.
Just click that toggle, and you're good to go for all future broadcasts. It’s that easy.
This one simple action can have a massive impact on your channel’s growth. With over 7 million active monthly streamers competing for attention, having VODs gives viewers a way to catch up and discover your content. It's no surprise that Partners and Affiliates—who get 60-day storage—often see better growth than regular streamers, whose VODs disappear after just 14 days. Learning how to save your streams is about more than just convenience; it directly affects your reach and earning potential. You can dig into more stats about the Twitch streaming landscape on streamscharts.com.
Pro Tip: I can't stress this enough: make enabling VODs the very first thing you do when setting up a new channel. I’ve seen too many new streamers have an amazing, career-making broadcast, only to realize afterward that it's gone forever because they forgot this simple step.
Should You Always Publish or Manually Review?
Right below the storage toggle, you'll spot another option: Always Publish VODs. If you enable this, your broadcasts will automatically go public the second your stream ends. It’s the perfect "set it and forget it" method.
The other option is to leave it turned off. If you go this route, your VODs will still be saved, but they'll remain unpublished in your Video Producer. This gives you the chance to review them, trim out the awkward silence at the start, or polish the title before anyone sees it.
Here’s how I help creators decide:
- Go with "Always Publish VODs" if you prioritize convenience and want your community to get instant access to replays.
- Stick with manual publishing if you're a perfectionist who likes to curate your content, cut out mistakes, or add polished titles and descriptions first.
Your choice here really depends on your personal workflow. But no matter which path you choose, getting that main Store past broadcasts toggle enabled is the one thing you absolutely have to do.
Making the Most of Your Saved Broadcasts
Alright, so you've flipped the switch to save your VODs. That's step one. Now, your channel is starting to build a collection of past streams, but don't let them just sit there gathering digital dust. This is where you get to turn that raw footage into content that keeps working for you long after you've gone offline.
Everything you need is tucked away in the Video Producer, which you can find in your Creator Dashboard. Honestly, it's one of the most powerful tools Twitch gives creators. Think of it as your command center for all things video—every broadcast, highlight, and upload you've ever made lives here.
Pop open the Video Producer, and you'll see a list of your past broadcasts. A little bit of housekeeping here goes a long way. Take a minute to give your VODs a proper title, write a compelling description, and maybe even swap out the thumbnail. These small tweaks make a huge difference for anyone browsing the videos on your channel.
Turning Marathon Streams into Snackable Highlights
Let’s be real for a second. Very few people have the time or patience to re-watch a full six-hour stream just to find that one amazing moment. That’s exactly what Highlights are for. They are your best friend when it comes to repurposing content directly on Twitch.
Making a highlight is surprisingly simple. Just head to your Video Producer, pick the VOD you want to work with, and hit the "Highlight" button. Twitch will pull up a basic timeline editor. All you have to do is drag the start and end markers to section off the part you want to save—that clutch win, a hilarious fail, or an interesting conversation.
Why bother with this? A few key reasons:
- Viewer-Friendly: Highlights are short, sweet, and perfect for grabbing the attention of people who don't have hours to spare.
- New Eyeballs: A well-titled highlight can pop up in search results, bringing new viewers to your channel who were looking for that specific type of content.
- They Don't Expire: This is the big one. Your regular VODs will vanish after 14 or 60 days, but highlights stick around on your channel forever.
Get into the habit of pulling two or three key moments from every stream and turning them into highlights. You're not just clipping video; you're building a permanent library of your greatest hits that can attract viewers for months or even years to come.
How to Download VODs for Your Personal Archive
Highlights are fantastic for showcasing your best moments on Twitch, but sometimes you need the whole thing. Maybe you’re planning a big YouTube compilation or you just want a personal backup of your work. Whatever the reason, downloading the full VOD is crucial because Twitch storage is temporary. Your hard drive is forever.
The process is straightforward. From that same Video Producer menu, find the broadcast you want to keep, click the little three-dot menu icon, and hit "Download." Depending on how long the stream was, Twitch might take a while to prepare the file. You'll get a notification when it’s ready to be saved as an MP4 to your computer.
This is the only way to guarantee you have a permanent, high-quality copy of your stream. For any creator serious about their content, this isn't optional. Don't risk losing hours of work to Twitch's auto-delete policy. Make downloading your VODs a standard part of your post-stream checklist.
Recording Locally for Ultimate Content Control
While Twitch VODs are a great place to start, relying on them entirely is a bit like building your house on rented land. Twitch server hiccups, DMCA takedowns that mute huge chunks of your audio, and those pesky storage limits can put your hard work at risk. If you're serious about your content, you need to be recording your streams directly to your own computer.
This is what we call local recording, and it’s the secret to having a permanent, high-fidelity master copy of every single broadcast. Think of it as your content insurance policy. It guarantees you always have a pristine version of your stream, completely free of any Twitch branding or those dreaded muted audio gaps.
Getting this set up in popular software like OBS Studio or Streamlabs is surprisingly straightforward. Both tools are built to handle streaming and recording at the same time, and they even let you use separate settings for each. This is huge. It means you can stream at a bitrate that keeps your live feed smooth for viewers, while simultaneously recording a crystal-clear version at a much higher quality for your archives.
Optimizing Your Local Recording Settings
The key to a good local recording is finding that sweet spot between video quality and file size without tanking your PC's performance. A bad configuration can lead to dropped frames or system lag, which affects not just your recording but your live broadcast, too.
Here are a few essential settings to dial in within your streaming software's "Recording" tab:
- Recording Format: Always, always use MKV instead of MP4. If your stream crashes or your PC reboots, an MKV file is salvageable. An MP4 file in the same situation will likely be corrupted and gone for good. You can easily convert the MKV to an MP4 later with a single click in OBS.
- Recording Quality: Don't just mirror your stream settings. This is your master copy! Choose a higher quality preset like "Indistinguishable Quality" or "High Quality, Medium File Size" to capture all the detail.
- Encoder: If you have a modern NVIDIA graphics card, the NVENC (new) encoder is your best friend. It’s designed to handle video encoding with minimal impact on your gaming performance, which is a massive advantage over using your CPU (x264).
Before you ever hit that "Start Streaming" button for a real broadcast, do a quick test recording for a few minutes. Play it back and make sure the video is smooth and the audio is perfectly synced. For a deeper dive into the gear you'll need, you can check out our full guide on what you need to stream on Twitch.
Why a Local Copy Is a Strategic Asset
Having a local recording isn’t just about having a backup; it's a foundational piece of your content strategy. Twitch is a massive platform, boasting around 240 million monthly active users and an average of 35 million daily viewers. Not all of them can watch you live. Your saved content is how you connect with that enormous audience after the live show is over.
A local file gives you total creative freedom. You can edit it into polished, long-form YouTube videos, chop up the best moments into viral TikToks or Reels, or repurpose it for any other platform you can think of—all without any loss in quality. This infographic shows just how central that saved file becomes.
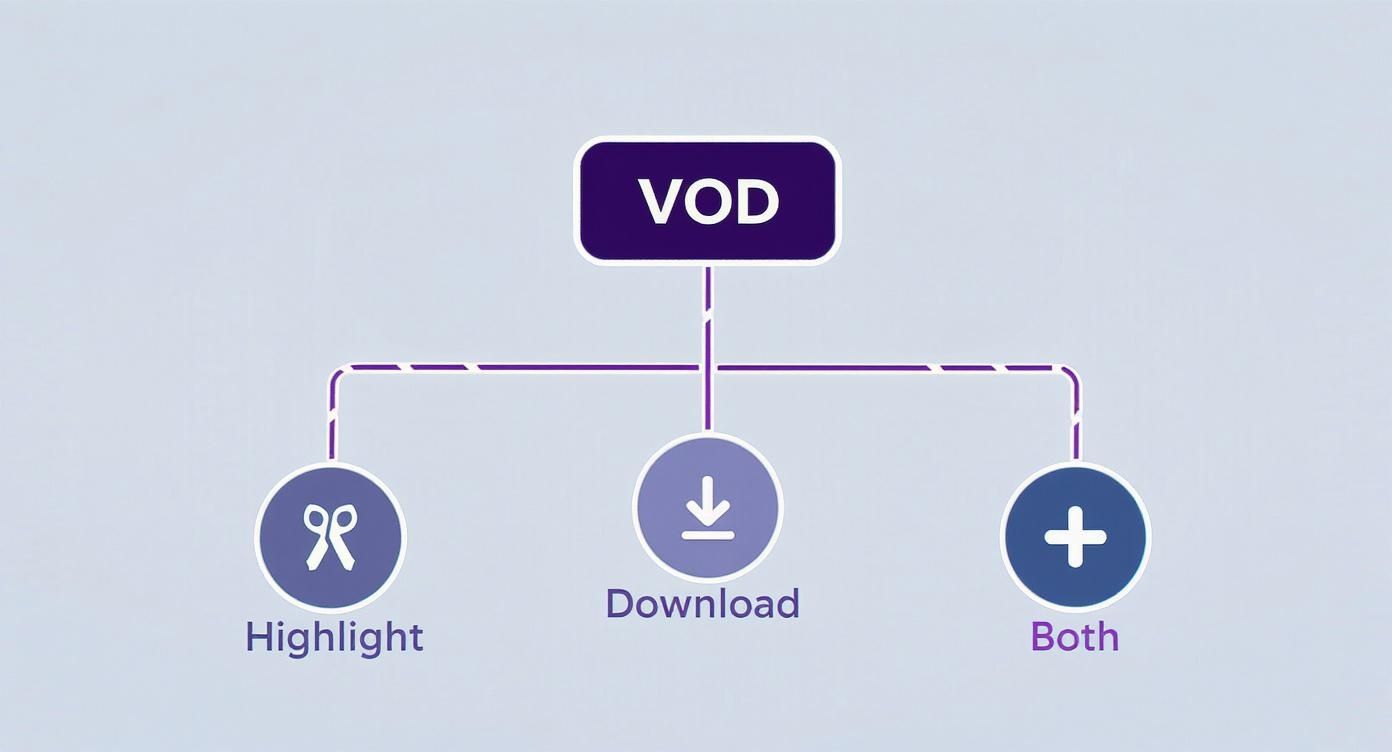
As you can see, that one saved VOD can branch out into multiple new pieces of content. You can create short-form highlights, keep the full file for a rainy day, or do both to get the most mileage out of every stream.
To help you decide which approach is right for you, let's break down the different ways you can save your streams.
Stream Saving Methods Compared
This table compares the most common methods for saving Twitch streams. Each has its own set of trade-offs, so think about what matters most for your workflow.
| Method | Pros | Cons | Best For |
|---|---|---|---|
| Twitch VODs | - Dead simple to enable. - No local storage needed. |
- Short-term storage (14-60 days). - Risk of muted audio. - Lower quality than local. |
Beginners and casual streamers who just want an easy way for viewers to catch up. |
| Local Recording | - Full ownership & control. - Highest possible quality. - Immune to DMCA mutes. |
- Requires significant hard drive space. - Can impact PC performance if not configured properly. |
Serious creators who want to repurpose content for YouTube, TikTok, and other platforms. |
| Cloud Services | - Automated & reliable backup. - Accessible from anywhere. - Integrates with editing & export tools. |
- Subscription costs. - Dependent on internet upload speed. |
Multi-platform creators and professionals who need a streamlined, automated workflow for archiving and distribution. |
Ultimately, there's no single "best" method—only the one that best fits your goals. For many, a hybrid approach works wonders: enable Twitch VODs for immediate viewer access while also keeping a high-quality local recording for long-term projects.
By recording locally, you shift from being a temporary broadcaster to a permanent content creator. You are building a library of assets that you own and control completely, independent of any platform's rules or limitations.
Building a Smart Content Repurposing Workflow
A saved stream is so much more than a backup; it's the raw clay for building a sustainable brand. Once you have that high-quality local recording, you’ve unlocked the potential to reach audiences far beyond your live Twitch viewership. This is the moment you graduate from being just a streamer to a multi-platform content creator. The secret is building an efficient workflow that turns one live broadcast into a dozen different pieces of content.
This whole process really starts with a smart archiving strategy. Please, don't let your valuable recordings get lost in a messy "Downloads" folder. Set up a clear, consistent file organization system right from the start. A simple structure on an external hard drive or a cloud service like Google Drive can save you hours of headaches later on.
A Practical Organization System
One of the most effective methods I've seen is organizing files by date and content. For example, you could create a main folder called "Twitch Stream Archives," then create subfolders for each year, then each month, and finally a dedicated folder for every single stream.
Inside each stream's folder, you can keep everything related to that broadcast:
- The raw, full-length MKV recording straight from OBS.
- An edited MP4 version ready for YouTube.
- A subfolder just for short-form clips (TikToks, Reels, Shorts).
- Any custom thumbnails or graphics you made for that content.
Getting this organized makes finding specific moments for future compilations or throwback posts incredibly easy. Trust me, your future self will thank you.
From One Stream to Many Content Pieces
The real magic of saving your streams is what you do with them next: repurposing. A single three-hour broadcast can easily fuel your content calendar for a week or even longer. Your goal is to pinpoint those highlight-worthy moments and then tailor them for different platforms, each with its own audience and formatting quirks.
Let's say you just wrapped up a long gaming session. That one recording can be broken down into:
- A Long-Form YouTube Video: Edit the full stream down into a tight, 15-20 minute "best of" video. The key is to cut out all the downtime and focus only on the most engaging parts.
- Multiple TikTok Clips: Find three to five hilarious, shocking, or skillful moments. Chop them into vertical, sub-60-second clips and add some punchy captions to grab attention on the "For You" page.
- Engaging Instagram Reels: You can often use the same clips as TikTok, but try a slightly different editing style for Reels. Maybe add some trending audio or interactive stickers to get your Instagram followers involved.
You need to shift your mindset from "I did a stream" to "I created a batch of raw content." This perspective is the foundation for building a brand that exists beyond Twitch, maximizing the impact of every minute you're live.
Streamlining Your Editing Process
Chopping up a long stream efficiently requires a plan. While you're watching your VOD back, keep a notepad (digital or physical) handy and jot down timestamps of potential highlights. Make a quick note of what happened and which platform it would be best for (e.g., "1:24:15 - Funny glitch, perfect for TikTok"). This simple habit turns a massive editing job into a manageable to-do list.
This repurposing workflow is a fantastic way to grow, but it all hinges on you being live in the first place. For creators looking to understand the core differences and strategic advantages, exploring the pros and cons of live versus pre-recorded video can offer some valuable insights. By mastering both, you create a powerful system for consistent, high-quality output.
Tackling Common Twitch VOD and Recording Headaches
Even with a perfect setup, things can go wrong. Technical glitches are just part of the streaming game. The real skill is knowing how to troubleshoot them quickly to protect your content and make sure your streams are properly saved.
One of the most heart-stopping moments for a streamer is realizing a VOD is missing. Before you panic, run through a quick mental checklist. Did you double-check that the Store past broadcasts toggle is still on? Sometimes a settings update can switch it off. Also, remember the expiration dates: VODs disappear after 14 days for most of us, or 60 days if you're a Partner or Prime member.
Occasionally, the problem is on Twitch's end. It's rare, but a server-side issue can cause a broadcast to fail processing, and the VOD never materializes. This is precisely why having a backup plan, like recording locally, is so crucial. Don't put all your eggs in one basket.
Why Is My VOD Audio Muted?
The number one VOD killer is muted audio. You wrap up an amazing stream, head to the replay, and discover a huge chunk is dead silent. This is almost always Twitch's automated copyright system doing its job, flagging music it thinks you don't have the rights to play.
Thankfully, you have a few ways to get ahead of this:
- Use Royalty-Free Music: Platforms like Epidemic Sound or Harris Heller's StreamBeats are built for creators. They offer massive libraries of music that are completely safe for streaming and won't get your VOD muted.
- Twitch's Soundtrack Tool: Twitch built its own solution for this. Their Soundtrack tool lets you play licensed music during your live broadcast, but it cleverly keeps that music off the VOD recording, preventing any copyright flags.
- Split Your Audio Tracks: This is a pro-level move in software like OBS Studio. You can configure your audio so that music is sent to your live stream but excluded from the separate audio track that Twitch uses for the VOD.
Muted audio doesn't just make for a bad viewing experience; it can make your VOD totally unusable for highlights or YouTube videos. Sorting out your audio sources before you go live is one of the smartest things you can do to protect your content archives.
Fixing Local Recording Glitches
Recording directly to your PC gives you a high-quality, permanent backup, but it comes with its own set of potential pitfalls. If your local recordings are stuttering or the audio is choppy, your computer is likely struggling to juggle both streaming and recording at the same time. This is often a performance issue.
Dropped frames are a dead giveaway that your system is overloaded. First, make sure you don't have a bad connection caused by a simple mistake, like an incorrect Twitch stream key. Next, check your recording encoder settings. If you have a modern NVIDIA graphics card, using a hardware encoder like NVENC is almost always the right call, as it takes the load off your CPU.
Audio sync issues—where your voice and the game are out of step—are another classic recording problem. This often happens when your microphone and other audio devices have different sample rates. Jump into your streaming software's audio settings and make sure everything is set to the same rate, usually 48 kHz. A quick 30-second test recording before each stream can save you from discovering hours of unusable footage later.
Tired of battling live technical issues? Pre-recorded LiveStream provides a stress-free alternative. You can record and perfect your content ahead of time, upload it, and schedule a flawless broadcast without ever worrying about dropped frames, muted VODs, or performance lag. To deliver a perfect stream every time, check out https://prerecordedlivestream.com.