
Before you can fix slow uploads, you have to know what you’re working with. The first step is always to measure your current performance to get a solid baseline. After that, you'd be surprised how often simple tweaks—like plugging in an Ethernet cable, shutting down background programs, or a quick router setting change—can make a huge difference.
Let's get your numbers first.
Understanding and Testing Your Upload Speed
We all get obsessed with download speed for binging Netflix, but upload speed is the unsung hero of modern internet life. It’s the invisible force that determines whether your Zoom calls are crisp or choppy, how fast your photos get to the cloud, and if you can game without infuriating lag.
With so many of us working from home and creating content, fast, reliable uploads are no longer a luxury. It's a necessity. We've seen the global median upload speed for fixed broadband climb to 51.49 Mbps, a jump driven almost entirely by the spread of fiber-optic networks. This isn't just a random statistic; it shows how critical upstream bandwidth has become for everyone.
How to Accurately Measure Your Speed
To get a true picture of your connection, you need a reliable measurement. A tool like Speedtest by Ookla is the go-to for a quick, visual check.
But don't just run it once and call it a day. For a reading you can actually trust, follow these steps:
- Go wired. Ditch the Wi-Fi for a moment and plug your computer directly into your router with an Ethernet cable. Wi-Fi is notoriously flaky and subject to interference; a wired connection tells you the real speed you're paying for.
- Silence the noise. Make sure nothing else is hogging your bandwidth. Shut down Netflix on the TV, pause your Dropbox sync, and close any other streaming apps or big downloads running on your network.
- Test, then test again. Run the test a few times throughout the day. Check it in the morning, afternoon, and again in the evening. This will reveal if your slowdowns are caused by neighborhood network congestion during peak hours.
Here’s what a typical result looks like, giving you the key metrics at a glance.
For our purposes, that upload speed—measured in Mbps—is the number we're zeroing in on.
What Is a Good Upload Speed?
Okay, so you have a number. What does it actually mean? Knowing what is a good upload speed for modern internet use is key to setting realistic expectations. A 5 Mbps upload speed might feel perfectly fine for sending emails, but it will absolutely choke when you try to stream video in 1080p.
For content creators, this is even more critical. Getting the right https://prerecordedlivestream.com/blog/bitrate-for-streaming.html is a constant balancing act between delivering a high-quality stream and what your internet connection can actually handle without dropping frames.
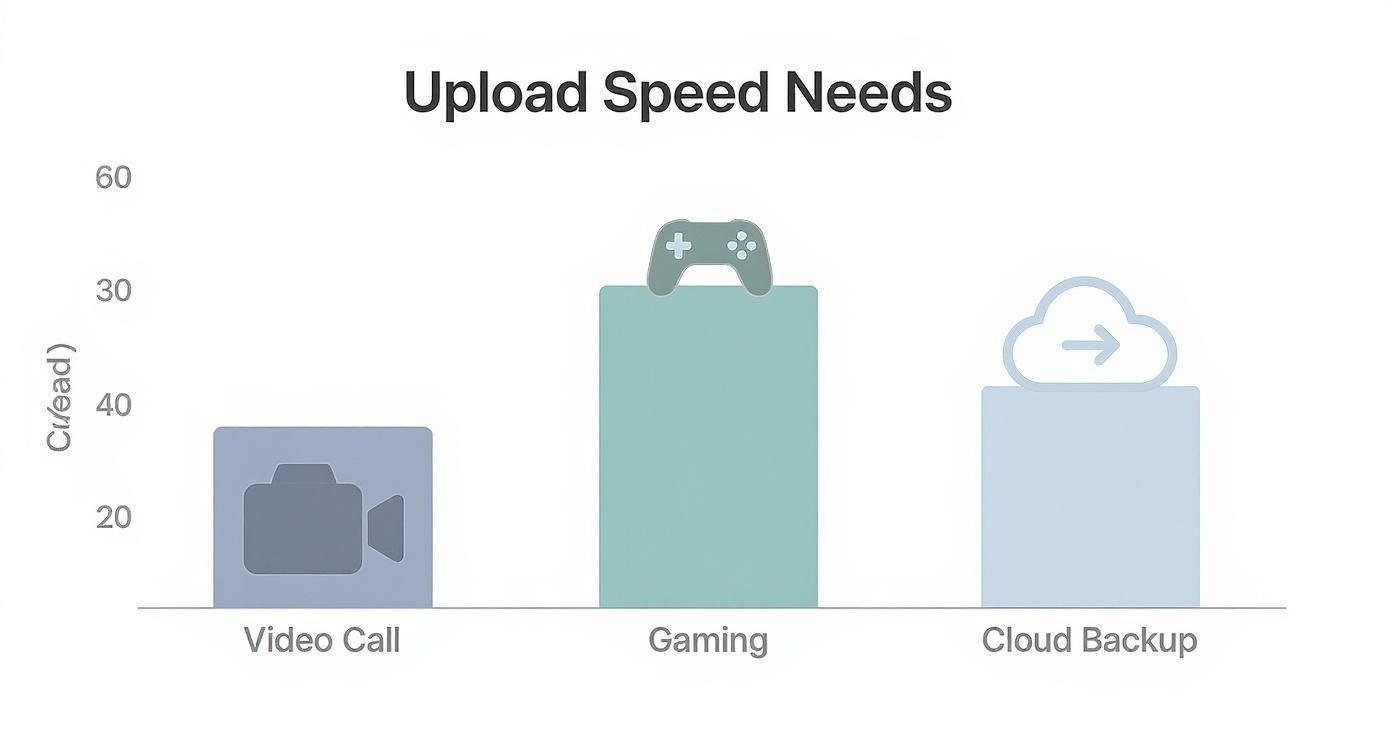
Use this quick reference guide to see how your speed test results stack up against the demands of popular online tasks.
Recommended Upload Speeds for Common Activities
| Online Activity | Minimum Required Speed (Mbps) | Recommended Speed (Mbps) |
|---|---|---|
| Video Calling (e.g., Zoom, Teams) | 1-2 | 3-5 |
| Online Gaming | 1 | 5+ |
| Standard Definition (SD) Streaming | 3 | 5 |
| High Definition (HD) 1080p Streaming | 5 | 10-15 |
| 4K UHD Streaming | 15 | 25+ |
| Uploading Large Files (Cloud Backup) | 5 | 20+ |
This table should give you a clearer idea of whether your current speed is a good match for what you're trying to do online or if it's time to start troubleshooting.
Quick Wins for an Immediate Speed Boost
Sometimes the most frustrating tech problems have surprisingly simple solutions. Before you start tearing your hair out over router settings or spending an hour on the phone with your ISP, let's look at a few quick fixes that can genuinely move the needle on your upload speed right now.
The single best thing you can do? Ditch Wi-Fi and plug in an Ethernet cable. Seriously. Wi-Fi is great for convenience, but it’s a shared, noisy environment. Signals get weakened by walls, thrown off by your microwave, and jammed up by your neighbor’s network. All that interference kills your consistency and torpedoes upload speeds.
A wired connection is like giving your data a dedicated, private lane straight to the internet—no traffic, no detours. If you’re serious about streaming or need reliable uploads for work, a hardwired connection is non-negotiable. It's a foundational part of building the best streaming set up for any kind of broadcast.
Hunt Down Hidden Bandwidth Hogs
Even with a rock-solid connection, other apps on your computer can be secretly eating up your upload bandwidth. I call them "bandwidth hogs." They run quietly in the background, constantly phoning home and sending data, leaving you with the scraps for your actual upload.
Cloud sync services are the usual suspects. Dropbox, Google Drive, and OneDrive are fantastic tools, but they’re designed to be constantly uploading. That background trickle of data can easily saturate a slow connection. Always pause them before a big upload.
Here’s a quick-hit list of apps to check and temporarily shut down:
- Cloud Storage: Pause Dropbox, Google Drive, iCloud, OneDrive, etc.
- Automatic Updates: Windows Update, macOS updates, and game launchers like Steam can use peer-to-peer sharing, which means they’re uploading to other users.
- Backup Services: Tools like Backblaze or Carbonite are always working, uploading your files for safekeeping.
- Torrent Clients: Even if you’re not downloading, you might be "seeding"—which is 100% upload traffic.
Pro Tip: Don't forget your network isn't just your computer. Someone else in the house streaming a 4K movie, a Nest camera uploading security footage, or even a laptop backing up to the cloud can slash your available upload speed in half without you realizing it.
Tidy Up Your Browser and Apps
The software you’re using matters, too. Some web browsers are heavier than others, and having dozens of tabs open is a classic resource drain. Each tab can maintain its own connection, with some running scripts that constantly sip away at your bandwidth.
When you have a critical upload, run through this simple pre-flight checklist:
- Close Everything: Shut down every single application that isn't absolutely essential for the upload.
- Pause Syncing: Double-check that all cloud services are fully paused.
- Go Minimalist: If you're using a web uploader, use a clean browser window with no other tabs open.
- Isolate Your Device: If you can, kick other devices off the network for a few minutes. Disconnect phones from Wi-Fi and pause the smart TV.
By clearing out all this digital "noise," you’re making sure every ounce of your upload power is focused on the one thing that matters. It’s a simple discipline, but it can easily turn a frustratingly slow upload into a surprisingly quick one.
Fine-Tuning Your Router and Home Network
Your router acts as the traffic controller for your entire home network, and if the quick fixes didn't get you the speed you need, it's time to look at the hardware itself. We're going to dive a bit deeper than a simple reboot and explore some settings and strategies that can make a real difference in your upload performance.
First, let's talk about something surprisingly simple: router placement. Wi-Fi signals get weaker as they travel through obstacles like walls, furniture, or even people. The best spot for your router is usually a central, elevated location, far from concrete walls or major appliances that can interfere with the signal.
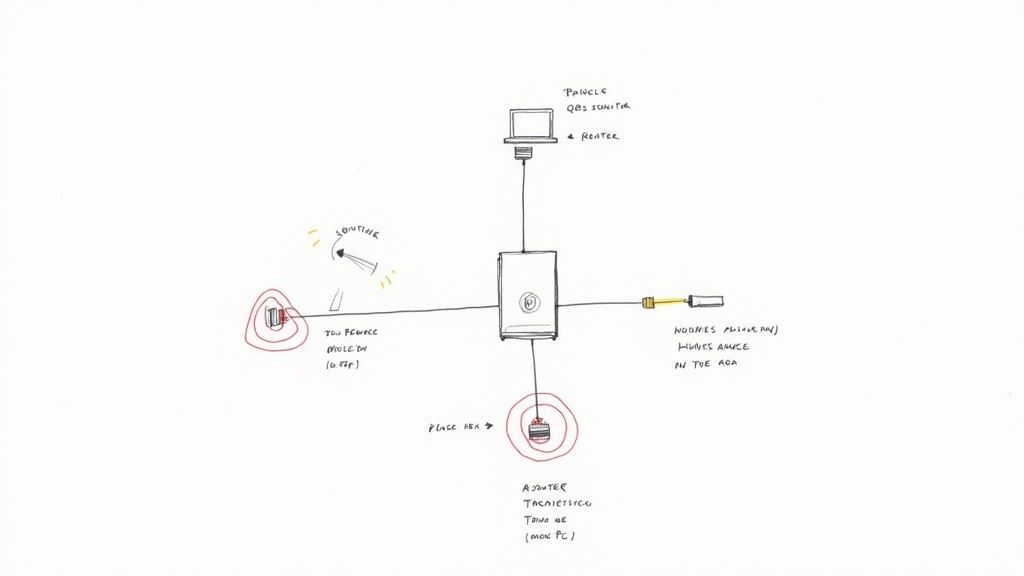
Think of it like placing a speaker in a room. The clearer the path and the closer you are, the better it sounds. The same principle applies here, and just moving your router can sometimes be the key to a more stable connection.
Prioritize Your Uploads with QoS
Buried in your router’s settings is a powerful tool called Quality of Service (QoS). Essentially, QoS is a digital bouncer for your network. It allows you to tell your router which devices or applications get priority access to your internet connection.
When you're trying to stream or upload a large file, QoS can stop other activities—like a family member watching Netflix in 4K or a gaming console downloading a huge update—from hogging all the upload bandwidth. Without it, your network is a free-for-all where every device fights for bandwidth, and your critical upload can easily lose out.
To set it up, you'll generally follow these steps:
- Log into your router's administration page using a web browser.
- Look for a section named QoS, "Traffic Management," or something similar. It's often tucked away in the "Advanced" settings.
- Enable the feature and find your primary computer or streaming device in the list.
- Assign it the highest priority level available.
This tells your router to protect your upload stream, no matter what else is happening on the network. For content creators, this is non-negotiable. In fact, a properly tuned network is fundamental when you're figuring out what you need to stream on Twitch successfully.
Update Firmware and Know When to Upgrade
Router manufacturers frequently release firmware updates. These updates do more than add new features; they often include critical performance improvements and security fixes that can boost your network's speed and stability. Make it a habit to check your router's admin panel for new firmware and install it.
If your router is more than four or five years old, it might be the bottleneck. Even with a fast internet plan, older hardware often lacks the processing power and modern standards to keep up with today's demands.
If you have an older model, upgrading could be your best move. Look for a router that supports modern standards like Wi-Fi 6 (802.11ax). The biggest benefit of Wi-Fi 6 isn't just a higher theoretical top speed; it’s designed to handle network congestion in homes packed with smart devices. This leads to a more stable and efficient connection for everyone, ensuring your upload bandwidth isn't being siphoned off by other gadgets.
When and How to Talk to Your ISP
If you've done everything on your end—optimized your network, plugged directly into the modem, and ruled out your own gear—but your uploads are still crawling, it’s time to look outside your home. The problem might be the service your Internet Service Provider (ISP) is delivering.
When your speed tests consistently come in far below the speeds you’re paying for, you need to have a chat with them. But don't just call and complain.
Before you even pick up the phone, get your facts straight. Run several speed tests using a wired connection at different times of the day and log the results. This data is your leverage. It shows the ISP that this isn't just a random blip or a Wi-Fi hiccup; it's a real, persistent problem with their service. A little preparation turns a potentially frustrating call into a productive troubleshooting session.
First, Know Your Connection Type
The kind of internet you have is the single biggest factor determining your upload potential. It’s a hard ceiling you can’t optimize your way past.
Most people have asymmetrical connections like cable or DSL. This means downloads are much, much faster than uploads. That design made sense when we mostly just consumed content from the internet, but it's a major bottleneck for anyone trying to stream, host video calls, or send large files.
Fiber-optic internet is the gold standard here. It's the most powerful upgrade you can make for upload speed because it offers symmetrical speeds—your upload is just as fast as your download. It’s not uncommon for fiber providers to deliver median upload speeds well over 290 Mbps. That's a different universe compared to what older connections can manage.
Pro Tip: That "up to 100 Mbps" your cable company advertises? That's almost always download speed. Dig into the fine print, and you might find your upload speed is capped at a frustratingly slow 5 or 10 Mbps. That alone could be your entire problem.
Having a Productive Conversation
When you finally call your ISP, your goal is to partner with them, not fight them. Start by clearly explaining the steps you've already taken. Tell them you've tested your speeds directly from the modem with an Ethernet cable and are still not getting what you pay for. This simple statement often helps you skip their standard first-level script of "have you tried turning it off and on again?"
Then, ask targeted questions to steer the conversation:
- "Could you please check my line for signal degradation or noise? I want to rule out a physical issue."
- "Is there any known network congestion or are there any outages in my area right now?"
- "Can you confirm the exact upload speed I'm supposed to get with my current plan?"
If the support agent confirms your line looks clean and there are no wider network problems, the discussion naturally pivots to your plan. This is your opening. It's time to ask about upgrade options.
For businesses or professionals with mission-critical upload needs, it can be helpful to understand more advanced options like dedicated internet connections like leased lines before you call. While typically a business solution, knowing what’s possible gives you context for the premium services they might offer.
Ultimately, if you’ve hit a wall with your current setup, upgrading your plan might be the only move left to get the performance you actually need.
Advanced Strategies for Power Users
When the basic fixes just don't cut it, it's time to get a little more sophisticated. If your job revolves around sending massive files to the cloud—think video editors, photographers, or remote collaborators—you know that every minute spent on an upload is a minute you're not doing something else. At this point, it's less about the internet pipe and more about being smarter with the data you're trying to push through it.
The most powerful lever you can pull is making your files smaller without a noticeable drop in quality. This is the art of file compression. Before you even drag that multi-gigabyte 4K video or a folder of RAW photos into your browser, take a moment to shrink it.
- General Files & Folders: For project files, documents, and code, a simple zip can work wonders. I'm a big fan of tools like 7-Zip or WinRAR for creating compressed archives. You'd be amazed how much space you can reclaim.
- Images: Don't upload unoptimized JPEGs or PNGs. Services like TinyPNG are fantastic for stripping out unnecessary data, making image files dramatically smaller with almost no visible difference.
- Videos: This is the big one. A free tool like HandBrake is an absolute must-have. It can re-encode your video into a much more efficient format, which can literally cut your file size in half.
This isn't just about saving a few megabytes. It's about fundamentally changing how much work your internet connection has to do, which has a direct and massive impact on upload speed.
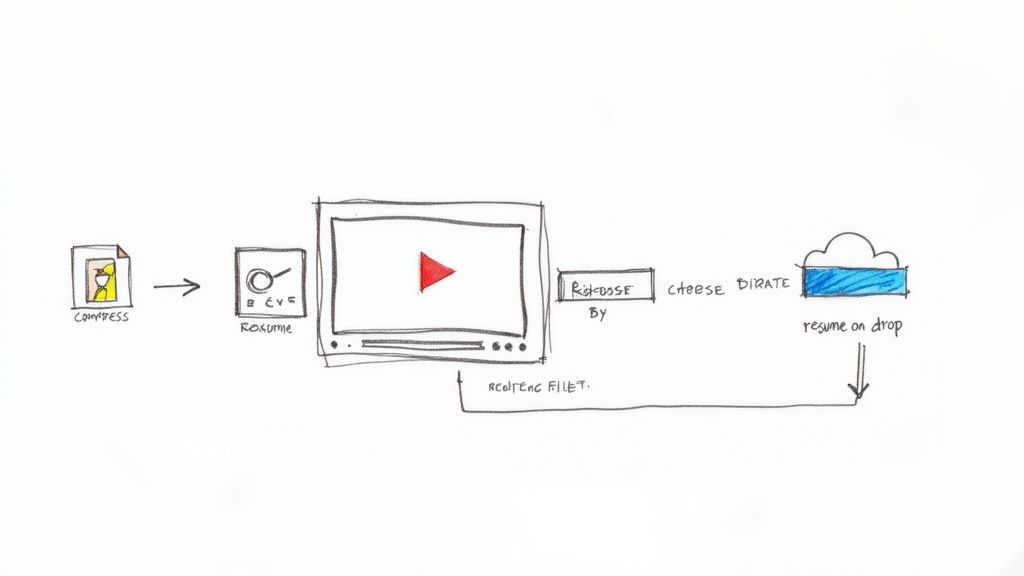
Optimizing Video for Faster Uploads
Let's be honest: video files are almost always the main culprit behind painfully slow uploads. A raw export from your editing software can be absolutely massive. The good news is that a couple of smart tweaks to your export settings can make a world of difference. The two you really need to understand are the codec and the bitrate.
A codec is essentially the language used to package your video. While H.264 is the old, reliable standard, newer codecs like H.265 (HEVC) or AV1 are far more efficient. They can deliver the same visual quality at a much smaller file size—often cutting it down by 25-50%. Your audience won't see a difference, but your upload progress bar will thank you.
Bitrate is all about data density—how much information is packed into each second of video. Higher bitrate means better quality and a bigger file. The trick is finding the right balance for your destination. If you're uploading a 1080p video to YouTube, you simply don't need a ridiculous 50,000 kbps bitrate. Dropping that to a more reasonable 8,000-12,000 kbps will still look great and will slash your upload time.
To see just how much of a difference this makes, let's look at a practical example.
How Video Settings Impact Upload Time
Here's a quick comparison for a 10-minute 4K video, showing how choosing a modern codec and a sensible bitrate can dramatically speed things up.
| Codec | Bitrate | Estimated File Size | Estimated Upload Time (at 10 Mbps) |
|---|---|---|---|
| H.264 | 50,000 kbps | ~3.75 GB | ~50 minutes |
| H.264 | 25,000 kbps | ~1.88 GB | ~25 minutes |
| H.265 (HEVC) | 25,000 kbps | ~1.5 GB | ~20 minutes |
| H.265 (HEVC) | 15,000 kbps | ~1.1 GB | ~15 minutes |
As you can see, simply switching from an older codec to a more modern one like H.265 and lowering the bitrate to a still-excellent quality level can cut your upload time by more than half. That's a huge win.
Build Resilient Upload Workflows
Even with a perfectly optimized file, a flaky internet connection can ruin your day. Nothing is more infuriating than watching an upload fail at 99% and having to start all over again. You need a workflow that can withstand a random disconnect.
The most frustrating part of a slow connection isn't the speed itself, but the unreliability. One dropped packet can undo hours of progress. Resumable uploads are the single best defense against this.
This is where specialized tools come into play. Many cloud storage services like Dropbox and professional transfer platforms like MASV or Aspera use a technique called chunked uploading. They intelligently break your file into smaller pieces, send them individually, and then reassemble them on the server.
If your connection hiccups, the transfer just pauses. Once you're back online, it picks up right where it left off with the last successful chunk. This simple change in strategy can save you an incredible amount of time and frustration.
Got More Questions About Upload Speed?
So, you’ve gone through the checklist of common fixes, but your uploads are still crawling. It happens. Let's dig into a few of the most frequent questions that come up when you're trying to squeeze every last bit of performance out of your connection.
A big one is about VPNs. Will they slow you down? The short answer: yes, almost always. A VPN has to encrypt your data and then bounce it through an extra server, which adds a bit of a delay. While a top-tier VPN can keep this slowdown to a minimum, you'll pretty much always get a faster upload with the VPN switched off.
Then there's the malware question. Could a virus or some other nasty software be hijacking your bandwidth? Absolutely. Malicious programs can be sneaky, running in the background and constantly sending out data, chewing up your upload capacity without you even knowing it. If your slow speeds feel like a complete mystery, a thorough system scan with a good anti-malware tool is a crucial next step.
Should I Upgrade My Router or My Internet Plan First?
This is the classic chicken-or-the-egg dilemma for anyone chasing better upload speeds. You don't want to waste money on a new router if your internet plan is the real bottleneck, and vice versa. Luckily, there's a straightforward test to pinpoint the culprit.
First, take your router out of the equation. Plug your computer directly into your modem using an Ethernet cable and run a speed test. This shows you the actual speed your Internet Service Provider (ISP) is delivering to your doorstep.
The results will tell you everything you need to know:
- If the direct modem speed is great (close to what you pay for) but your Wi-Fi is sluggish, your router is the weak link. A router that's more than four or five years old is often the prime suspect. A new one could make a world of difference.
- But, if that direct modem speed is still slow, then a new router won't fix a thing. The problem lies with your internet plan itself. It’s time to have a chat with your ISP about upgrading to a package with better upload performance.
This simple modem test is the most important diagnostic you can run. It tells you exactly where to put your money to get the best results, saving you from a frustrating and expensive guessing game.
By figuring this out, you can be confident that you're tackling the real source of the slowdown.
For content creators who can't leave their streams to chance, Pre-recorded LiveStream separates your live event's success from your home internet's reliability. You can upload your finished video on your own time, schedule it to go live, and let our powerful cloud servers deliver a perfect, buffer-free broadcast to your audience. See how it works and get started at https://prerecordedlivestream.com.