
Before you even think about hitting that "Go Live" button on multiple platforms, you need a game plan. Seriously. Jumping in without a clear strategy is the fastest way to a chaotic, low-engagement broadcast. It all comes down to knowing your goals, picking the right platforms for your audience, and making sure your brand looks and feels the same everywhere.
Building Your Multistreaming Foundation
A little bit of planning upfront separates the polished, professional-looking streams from the ones that feel thrown together. This is your foundation, and it all starts with a simple question: What are you trying to accomplish? Are you looking to build a dedicated community, capture business leads, or just get your name in front of as many eyes as possible?
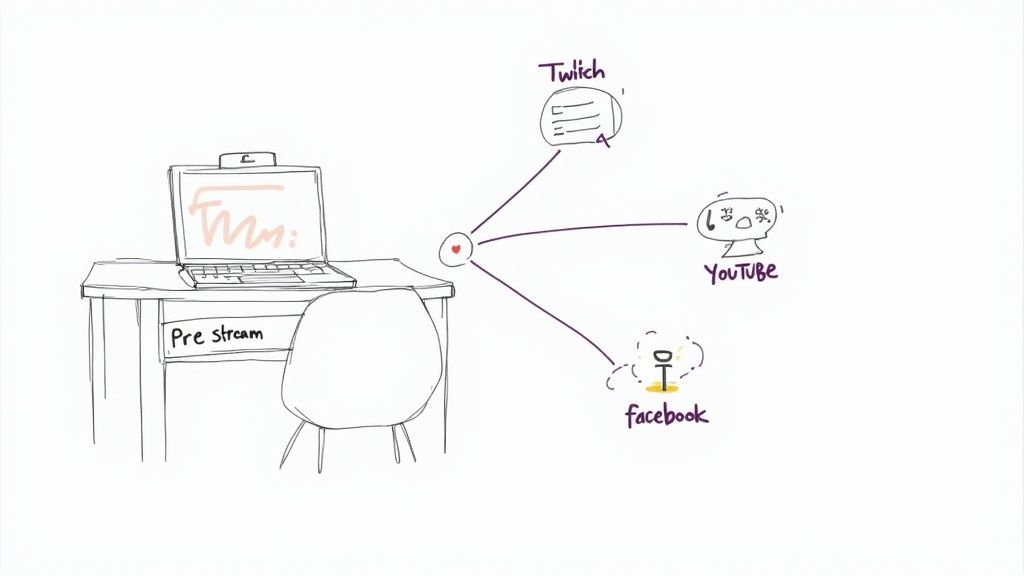
Your goals will tell you exactly which platforms to focus on, because each one has its own distinct audience and purpose.
- Twitch: This is the kingdom of gaming and highly interactive content. If you're building a community that thrives on real-time engagement with things like custom emotes and channel points, Twitch is your spot. Viewers there expect longer, more immersive streams.
- YouTube Live: Nothing beats YouTube for discoverability. Its search algorithm is a powerhouse for reaching new people, and since your streams are automatically saved, you’re building a permanent library of content that works for you long-term.
- Facebook Live: If you already have a community on Facebook, this is a no-brainer. It’s the perfect tool for connecting directly with the followers you’ve already established on a platform they use every day.
- LinkedIn Live: For anything B2B—from professional workshops to industry news—LinkedIn Live gives you a direct line to a business-focused audience. It's fantastic for establishing thought leadership and generating professional leads.
Establish a Cohesive Brand Identity
Once you've picked your channels, you need to look like you belong there—everywhere. Your brand identity—username, profile picture, overlays, even your on-air personality—should be consistent across the board. This is how you build trust and make it easy for a fan on one platform to find and recognize you on another.
A huge part of this is having a winning content distribution strategy that keeps your core message the same while still respecting the unique vibe of each platform. For example, your on-screen graphics should always use the same colors and fonts, creating that instant recognition.
A strong, consistent brand across platforms doesn't just look professional; it creates a unified experience for your audience, making them feel part of a single community regardless of where they're watching.
Create Your Pre-Stream Checklist
I can't stress this enough: a simple checklist will save you from most common technical headaches. This isn't about memorizing complex settings; it's about creating a repeatable routine that helps you go live with confidence every single time.
Your personal checklist should cover the absolute essentials:
- Test your internet connection speed (the number one stream killer).
- Do a quick mic and camera check.
- Make sure your lighting looks good on screen.
- Have your titles, descriptions, and tags ready to copy-paste.
- Open all the software and browser tabs you'll need beforehand.
This prep work should also include your content. Even a rough outline or a few bullet points can prevent those dreaded awkward silences and keep your stream on track. Doing this groundwork means that when you finally go live, you can focus on your audience instead of scrambling to fix a problem.
Ultimately, the technical quality of your stream comes down to how your video is processed. It's worth getting familiar with the basics of video encoding before you start. For a deeper dive, check out our guide on what is encoding video.
Choosing Your Multistreaming Method
So, you're ready to go live on multiple platforms at once. The first big decision you need to make is how you'll get your stream from your computer out to the world. This isn't just a technical detail—it shapes your entire workflow, dictates the gear you'll need, and defines how much control you have over the final broadcast.
You're essentially standing at a fork in the road. One path leads to using local software encoders right on your own machine. This is like building your own personal TV studio on your desktop, giving you direct, hands-on control over every single detail.
The other path is to use a cloud-based multistreaming platform. These services are like a powerful distribution partner. You send them one pristine stream, and they take on the tough job of broadcasting it to all your destinations for you.
The Power and Demands of Local Software
Using a local encoder, like the ever-popular OBS Studio or Streamlabs Desktop, is the traditional way to go live. There's a good reason it's stuck around: it gives you ultimate, granular control. You can craft incredibly complex scenes, layer in dynamic overlays, switch between multiple cameras, and design custom transitions—all from your computer.
This is the go-to method for creators who want to put a truly unique spin on their content. If you're a gamer who needs custom alerts popping up for every new sub, or you're running a webinar and need to flawlessly switch between your camera and a detailed slide deck, local software is your playground.
But all that power has a price. Every new destination you add puts more and more strain on your computer's CPU and your internet's upload bandwidth. Your machine has to encode and push out a separate video stream for each platform in real-time, which is a seriously demanding job.
My Take: Local encoders give you the keys to the kingdom in terms of creativity. But be honest with yourself—your PC and internet connection need to be absolute workhorses to handle sending out multiple, independent streams without a hitch.
For a deeper dive into the software itself, you might find our guide on the best free live streaming software helpful.
The Simplicity of Cloud-Based Platforms
Cloud-based services like Restream or our own Pre-recorded LiveStream take a totally different route. Instead of making your computer sweat, you send just one, high-quality stream up to their service. From there, their powerful servers do the heavy lifting, duplicating your broadcast and sending it out to YouTube, Twitch, Facebook, or wherever else you've linked your accounts.
This approach is a massive relief for your hardware. Your computer only has to worry about encoding a single stream, and your internet connection just needs to handle one upload. That makes it an absolute game-changer for anyone working with a mid-range PC or a less-than-perfect internet connection.
- Lighter Hardware Load: Your computer is freed up from the intense task of encoding multiple streams at once.
- Bandwidth Saver: You only need enough upload speed for a single high-quality stream, not three or four.
- Set-It-and-Forget-It Workflow: You connect your accounts on the platform once, and from then on, you just go live.
This is the perfect path for creators who value stability and simplicity above all else. If your main goal is to get your content in front of the largest audience possible with the least amount of technical headache, a cloud service is the clear winner. This is especially true for simulive events, where you're broadcasting a pre-recorded video—the cloud platform handles everything, completely removing any real-time encoding demands from your setup.
To help you visualize the trade-offs, I've put together a quick comparison of the two approaches.
Local Encoders vs Cloud Platforms: A Comparison
Choosing between a local encoder and a cloud platform really comes down to balancing control with convenience. This table breaks down what you can expect from each method.
| Feature | Local Software Encoder (e.g., OBS) | Cloud-Based Platform (e.g., Restream) |
|---|---|---|
| Hardware Demand | High (Requires a powerful CPU/GPU) | Low (Only needs to handle one stream) |
| Internet Usage | High (Upload bandwidth scales with platforms) | Low (Only one upload stream required) |
| Customization | Maximum (Full control over scenes, overlays) | Varies (Often uses templates or simplified tools) |
| Ease of Use | Moderate to high learning curve | Very easy and straightforward to set up |
| Reliability | Depends on your PC and internet stability | High (Relies on stable cloud infrastructure) |
| Cost | Software is often free, but requires good hardware | Typically involves a monthly subscription fee |
Ultimately, there's no single "best" answer. The right choice depends on your specific goals, your technical comfort level, and the resources you have available.
Dialing in Your Broadcast for a Flawless Multistream
Okay, you've decided how you're going to multistream—now it's time to get into the nitty-gritty. This is where we connect all the pipes and tune the engine to make sure your broadcast is stable, sharp, and professional. Getting these details right from the start is what separates a smooth, engaging show from a pixelated, buffering mess.
First things first, you need the "keys" to each platform's front door. Every streaming service uses a unique combination of an RTMP URL and a stream key to know where your video feed is coming from and where it should go.
Think of it like this: the RTMP URL is the street address of the platform's broadcast server (like YouTube's or Twitch's), while the stream key is the unique key to your apartment in that building. Without both, your stream has nowhere to go.
You can usually find these in the "Go Live" or "Creator Studio" sections of each platform. On YouTube, they’re right there in the "Stream" tab. For Twitch, you’ll dig into your Creator Dashboard under "Settings" > "Stream." Grab them for every platform you plan to go live on.
Connecting Your Destinations
Once you have your credentials, it's time to plug them into your software. The process looks a little different depending on your setup.
If You're Using a Cloud Platform: This is the easy part. Most cloud-based tools just ask you to log into your YouTube, Twitch, or Facebook accounts directly from their dashboard. They handle all the complicated RTMP stuff in the background, so you don't have to touch a single stream key.
If You're Using a Local Encoder (like OBS): You'll need to do this manually. In a tool like OBS Studio, you'd navigate to "Settings" > "Stream," pick a primary service from the list, and paste in your stream key. To add more destinations, you'll need a special tool like the "Multiple RTMP outputs" plugin. This lets you add and manage custom RTMP destinations for every other platform you want to hit.
This diagram shows a great visual of the two main paths your stream can take—either pushing directly from your computer or sending a single feed to a cloud service that does the heavy lifting for you.
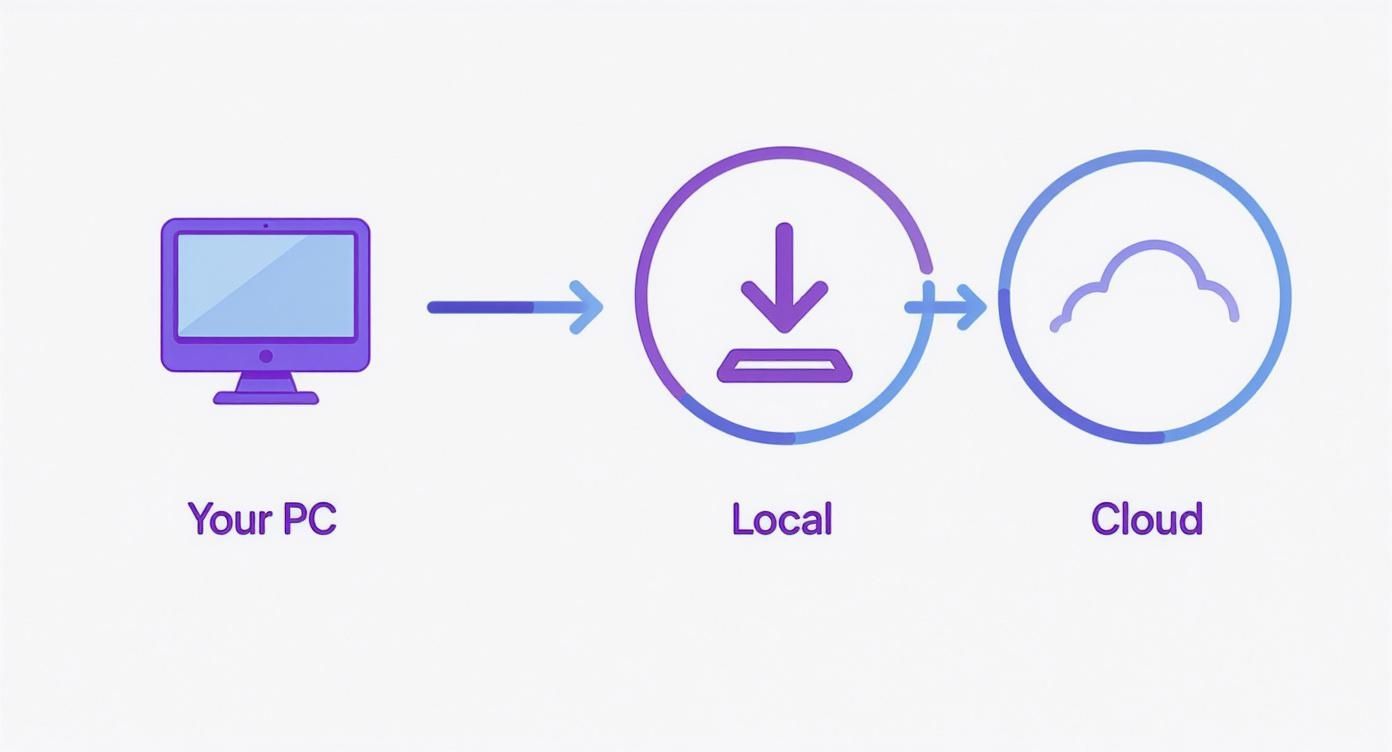
This really highlights the core trade-off: the local route demands a lot more from your PC and internet connection, while the cloud route takes that technical burden off your shoulders.
Nailing Your Bitrate and Resolution
If there's one setting that can make or break your stream's stability, it's the bitrate. This is the amount of data you're sending to the streaming server every second, measured in kilobits per second (kbps). A higher bitrate gives you better video quality, but it also requires a seriously fast and stable internet upload speed.
The single most common mistake I see streamers make is setting their bitrate way too high for their internet to handle. This leads to dropped frames, which is when your software just can't push the data out fast enough. For your viewers, this looks like a choppy, stuttering nightmare.
My Personal Rule of Thumb: Never set your total bitrate higher than 75% of your consistent upload speed. If you have a 10 Mbps upload connection (that's 10,000 kbps), you shouldn't push much beyond 6,000-7,500 kbps for a single 1080p stream. Use a speed test site, but don't just trust the peak number—watch it for a bit to see what it holds steady at.
Here are some solid starting points for a single destination:
| Resolution | Recommended Bitrate (kbps) |
|---|---|
| 1080p at 60fps | 6,000 - 9,000 |
| 1080p at 30fps | 4,500 - 6,000 |
| 720p at 60fps | 4,500 - 6,000 |
| 720p at 30fps | 3,000 - 4,500 |
Now, if you're multistreaming from your own machine, you have to multiply that bitrate by the number of platforms. Pushing three separate 1080p streams at 6,000 kbps each would require a sustained upload speed of 18,000 kbps (18 Mbps). This is a huge reason why cloud-based multistreaming services have become so popular. For a deeper dive, check out our guide on the best bitrate for streaming to help you find that perfect number.
Fine-Tuning Your Encoder Settings
Beyond bitrate, there are a couple of advanced encoder settings that can really impact your stream's quality and performance. The default settings in OBS are pretty good these days, but a few small adjustments can make a world of difference, especially when you're pushing to multiple platforms.
In OBS or a similar encoder, head to the "Output" settings and switch to "Advanced" mode. Look for these two options:
Encoder Preset: This setting controls how much CPU (or GPU) power is used to compress your video. The presets range from
ultrafast(lowest quality, lightest on your PC) toplacebo(best quality, but will bring even a powerful PC to its knees). For most streamers,veryfastorfasteris the sweet spot, giving you a great-looking stream without maxing out your processor.Keyframe Interval: This tells the stream how often to send a full video frame (a keyframe). Most major platforms, including Twitch and YouTube, require this to be set to 2 seconds. If it's set incorrectly, viewers might experience long buffering delays when they first join your stream.
By taking the time to configure these core settings, you're building a solid technical foundation. It takes the guesswork out of going live and gives you the confidence that your stream will look crisp and run smoothly for everyone, no matter where they're watching.
Designing Professional Graphics and Overlays
Let's be honest: what separates a casual stream from a polished, professional broadcast often comes down to the visuals. When you're multistreaming, a strong visual identity is more than just eye candy. It builds brand recognition and creates a seamless experience for your audience, whether they're watching on YouTube, Twitch, or Facebook. This is where you really level up your production value.
This all starts before you even think about hitting that "Go Live" button. Your stream should have a flow, much like a TV show. Graphics like intros, outros, and a "Starting Soon" screen give your broadcast a clear beginning, middle, and end. It helps manage viewer expectations and gives people a moment to trickle in before the main event kicks off.
Building Your On-Screen Brand Kit
Think of your on-screen graphics as a family. They all need to share the same visual DNA—consistent fonts, colors, and logo placement across every single asset. This consistency is key. Someone who discovers you on Twitch should instantly recognize your brand when they stumble upon your content on YouTube.
Here are the essentials for your brand kit:
- Starting Soon Screen: This is your audience's first impression. Use it to build some hype with a countdown timer, flash your social media handles, and get some good background music playing.
- Main Overlay: This is the frame around your content. It can be a simple webcam border and logo, or it can be decked out with alerts for new followers, chat boxes, and other dynamic elements.
- "Be Right Back" Screen: When you need a quick break, this is a much more professional look than leaving your audience staring at an empty chair.
- Ending Screen / Outro: This is your last chance to make an impression. Thank your viewers, plug your next stream, and point them toward your website or other social channels.
A clever way to integrate these elements is by utilizing image overlay video to place graphics and text right onto your video feed. This is perfect for dynamic lower-thirds that introduce a guest or highlight a key topic, making the information easier for viewers to absorb.
Integrating Dynamic and Interactive Overlays
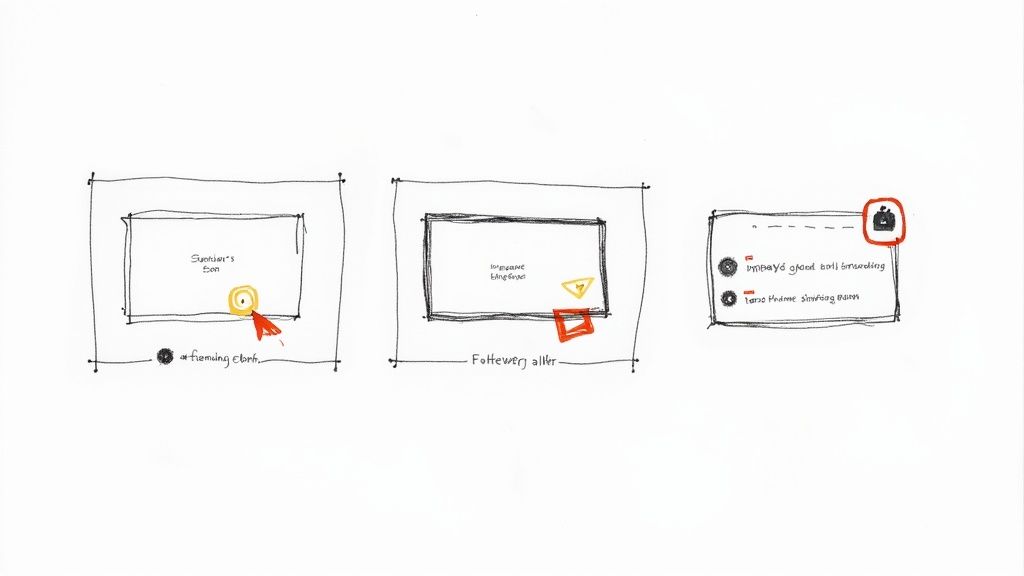
Static images are a solid starting point, but dynamic overlays make a stream feel truly live. These are graphics that update in real-time based on what your audience is doing, turning passive viewers into active participants.
For instance, when a new follower alert pops up with a custom sound effect, it makes that person feel seen and valued. A goal bar tracking donations for a charity stream can bring the whole community together around a common cause.
Think of your overlays as an extension of your conversation with the audience. They are visual cues that show you're listening and reacting, which is incredibly powerful for building a loyal community across different platforms.
Sourcing and Implementing Your Assets
The good news is you don't need to be a graphic design pro to get a slick visual package for your stream. There are tons of resources out there for creators at every skill level.
Where to Find High-Quality Graphics
- Overlay Marketplaces: Sites like OWN3D and Nerd or Die are treasure troves. They offer complete, professionally designed stream packages—alerts, transitions, everything—often for a reasonable one-time price.
- Freelance Designers: If you want something totally unique that fits your brand perfectly, check out platforms like Fiverr or Upwork. You can find countless artists who specialize in creating custom stream graphics.
- DIY with Templates: Don't want to hire someone? Tools like Canva or Adobe Express have user-friendly templates you can customize with your own branding. You get a professional look without the steep learning curve.
Once you have your assets, getting them into your stream is a breeze with platforms like StreamElements or Streamlabs. You can build out all your scenes in their browser-based editors and then add them to your software (like OBS) as a single "Browser Source." This makes managing your graphics incredibly efficient, which is a lifesaver when you need a consistent look everywhere you stream.
Managing Audience Interaction Across Channels
When you go live on multiple platforms at once, you’re casting a wider net—but you’re also splitting your audience. The chat on YouTube is a completely different conversation from the one happening on Twitch, and your Facebook viewers are in their own little world. This is one of the biggest hurdles in multistreaming, but if you get it right, it's also your biggest opportunity to build a truly unified community.
The goal is to break down the walls between those separate chat boxes. You need a way to see every single message, no matter where it came from, and make everyone feel like they're part of the same event. Without the right setup, you're just frantically tabbing between browsers, missing comments and leaving people feeling ignored.
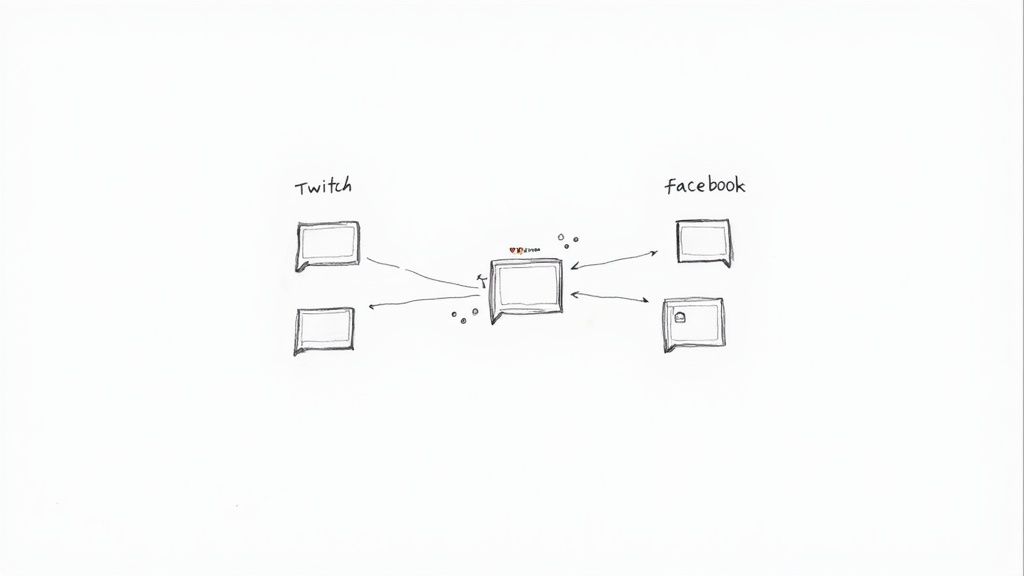
This is where chat aggregation software becomes your best friend. Tools built into platforms like Restream or included in software like Streamlabs Desktop pull all those separate chat feeds into one clean, manageable column. A message from YouTube pops up right below one from Twitch, each clearly flagged with its origin.
Unifying Your Community with Chat Aggregation
Having a single, unified chat feed is a game-changer. Instead of juggling a half-dozen windows, you have one command center for every interaction. This lets you respond to people in real-time, no matter where they're watching from, which creates a much more cohesive feel for your audience.
When someone on YouTube sees you answer a question from a viewer on Twitch, it subtly reminds them that they’re all part of one big community tuning in together. That cross-platform acknowledgment is incredibly powerful for boosting engagement. It even encourages viewers to interact with each other in a way, even if they can't see the other platform's chat directly.
To really make this work, you have to be intentional about creating an inclusive vibe. Here’s how:
- Acknowledge the Platform: When you read a comment, give a shout-out to its source. Saying, "Great question from Sarah over on YouTube," helps bridge the gap between channels.
- Encourage Cross-Pollination: Casually remind your audience that you're live everywhere. You might be surprised how many of your Twitch regulars start checking out your YouTube VODs, and vice versa.
- Standardize Your Moderation: Whether you use a bot or a human moderator, make sure they can see and manage the unified chat. This ensures you have consistent rules across all platforms, preventing one chat from becoming the "wild west" while another is strictly controlled.
Handling Platform-Specific Features
While the goal is to unify the chat, you can't just ignore the unique features that make each platform special. Twitch has channel points and custom emotes; YouTube has Super Chats and member milestones. Ignoring these is like ignoring a huge part of your audience.
The best approach is to embrace the differences. When someone on Twitch redeems channel points for a sound alert, announce it to everyone. When a Super Chat pops up on YouTube, give it the same enthusiastic thank you. This makes viewers feel like their specific way of supporting you is seen and valued.
The live streaming market is absolutely booming, which just goes to show how critical it is to engage every single viewer. The market was estimated at $100 billion in 2024 and is on track to hit $345 billion by 2030. With Twitch alone making up roughly 61% of all live-streaming hours watched globally, connecting with your audience on these massive platforms is non-negotiable. You can find more fascinating numbers in these live streaming statistics on Teleprompter.com.
Ultimately, managing interaction when you stream multiple platforms is less about the tech and more about how you lead your community. By using the right tools and consciously fostering an inclusive atmosphere, you can turn a scattered audience into a single, loyal fanbase.
Testing and Troubleshooting Your Setup
Nothing kills the vibe of a live broadcast faster than a technical meltdown. The difference between an amateur and a pro isn't about having a perfect setup; it's about catching problems before they go live. A few simple checks beforehand can prevent 90% of the issues that might otherwise derail your stream.
Think of it as a pilot's pre-flight checklist. Before every broadcast, you need to run through your own routine. It’s not about being paranoid—it's about building a repeatable process that becomes second nature. This muscle memory frees you up to focus on your content, not on whether your mic is working.
Your Pre-Broadcast Checklist
Give yourself about 15-20 minutes before you’re scheduled to start. This is your window to fix anything that’s gone sideways without the pressure of a waiting audience.
- Platform Connection Test: Don't just assume your stream keys will work. Start a private or unlisted stream on every single one of your destinations to confirm they're all receiving your signal loud and clear.
- Audio and Video Sync Check: This one's crucial. Record a quick 30-second clip locally. A loud clap on camera is the classic way to check sync—when you play it back, the sound of the clap should match the visual perfectly.
- Scene Transition Rehearsal: In your streaming software like OBS Studio, click through every scene you plan to use. Does your webcam pop up? Is the screen share showing the right window? Are the transitions between scenes smooth?
- Overlay and Alert Verification: Manually trigger a few test alerts (like a new follower or subscriber). You want to make sure they actually appear on screen and aren't hiding behind another graphic. Also, double-check that all your lower-thirds and other overlays are positioned correctly.
Making this checklist a non-negotiable part of your routine is the single best way to ensure you can stream multiple platforms with confidence. It’s a small time investment that pays off big time.
Diagnosing Common Multistreaming Problems
Even with the best prep, things can go wrong. When they do, the trick is to know what to look for so you can fix the root cause instead of just flailing. Most issues fall into three buckets.
The golden rule of troubleshooting is to change only one thing at a time. If you mess with your bitrate, resolution, and encoder preset all at once, you’ll have no idea which change actually solved the problem—or made it worse.
Put on your detective hat and isolate the variables until you find the culprit.
| Symptom | Likely Cause | Quick Fix |
|---|---|---|
| Choppy, Stuttering Video (Dropped Frames) | Your internet upload speed can't handle your current bitrate. | Go into your encoder settings and lower your video bitrate by 20%. Keep an eye on your software's stats to see if the frame drop rate improves. |
| Audio Sounds Robotic or Out of Sync | Your computer's CPU is maxed out and struggling to encode everything in real-time. | Kill any programs or browser tabs you don't absolutely need. If it's still struggling, drop your encoder preset to a less demanding option (e.g., from fast to faster). |
| One Platform Won't Connect or Fails | The stream key is probably wrong, has expired, or the platform itself is having a bad day. | Carefully copy and paste the stream key again. If you're sure it's correct, go to that platform's dashboard and generate a brand-new key. |
Got Questions About Multistreaming? We've Got Answers.
Diving into multistreaming for the first time? It's natural to have a few questions. Let's tackle some of the most common ones I hear from creators who are ready to expand their reach.
"Is My Internet Connection Good Enough for This?"
This is, hands down, the first thing everyone asks, and for good reason. The answer really depends on how you're multistreaming.
If you're using a cloud-based service, your job is simple. You just need enough upload speed to send a single, high-quality stream to their servers. For a crisp 1080p stream, a stable 6-8 Mbps upload speed will do the trick. The cloud service handles the heavy lifting of sending it out to all your destinations.
But if you’re trying to stream directly from your own computer using software like OBS, the math changes completely. Streaming to three platforms at 6 Mbps each means you need a rock-solid 18 Mbps of sustained upload bandwidth. This is a big reason why so many streamers opt for a cloud solution to avoid maxing out their home internet.
"Will I Get in Trouble or Banned From a Platform?"
For the most part, you're in the clear. Platforms like YouTube and Facebook are totally fine with you multistreaming.
The big one to watch out for is Twitch. If you're a Twitch Affiliate or Partner, their exclusivity clause is a big deal. The terms usually require a 24-hour exclusivity period for any content you stream on their platform.
What does this mean in practice? You can't stream that same broadcast to YouTube, Kick, or another public platform at the same time. These agreements can and do change, so I always recommend giving the latest Twitch Affiliate or Partner agreement a quick read before you go live.
"How on Earth Do I Keep Up With All the Different Chats?"
Trying to manage multiple chats on different browser tabs is a recipe for chaos. You'll miss messages and your communities will feel disconnected. You absolutely need a tool to bring them all together.
The solution is a chat aggregator. Many multistreaming platforms have this feature built right in, and software like Streamlabs also offers a unified chat box.
This pulls all your comments from every platform into one single, manageable feed. You can see everything in one place, respond in real-time, and make your entire audience—no matter where they're watching—feel like they're all part of the same conversation. It’s a game-changer for community engagement.
Ready to broadcast your pre-recorded content live without the stress? Pre-recorded LiveStream lets you schedule and simulcast flawless video streams to all your favorite platforms from the cloud. Start streaming smarter today.