So, you want to start streaming on Twitch? It all boils down to a few key pieces of the puzzle: a solid internet connection, a device to broadcast from (like a PC or console), some software to tie it all together, a microphone, and a webcam. Think of these as the absolute must-haves for any broadcast, whether it's your very first time going live or you're running a full-blown professional show.
Your Essential Twitch Streaming Starter Kit
Jumping into Twitch can feel overwhelming at first, like you need a Hollywood studio to get started. But really, what you need to stream on Twitch can be broken down into three main areas: hardware, audio/video gear, and software. The great thing is that you can start small and upgrade as you go.
This infographic lays out the hierarchy of a good streaming setup.
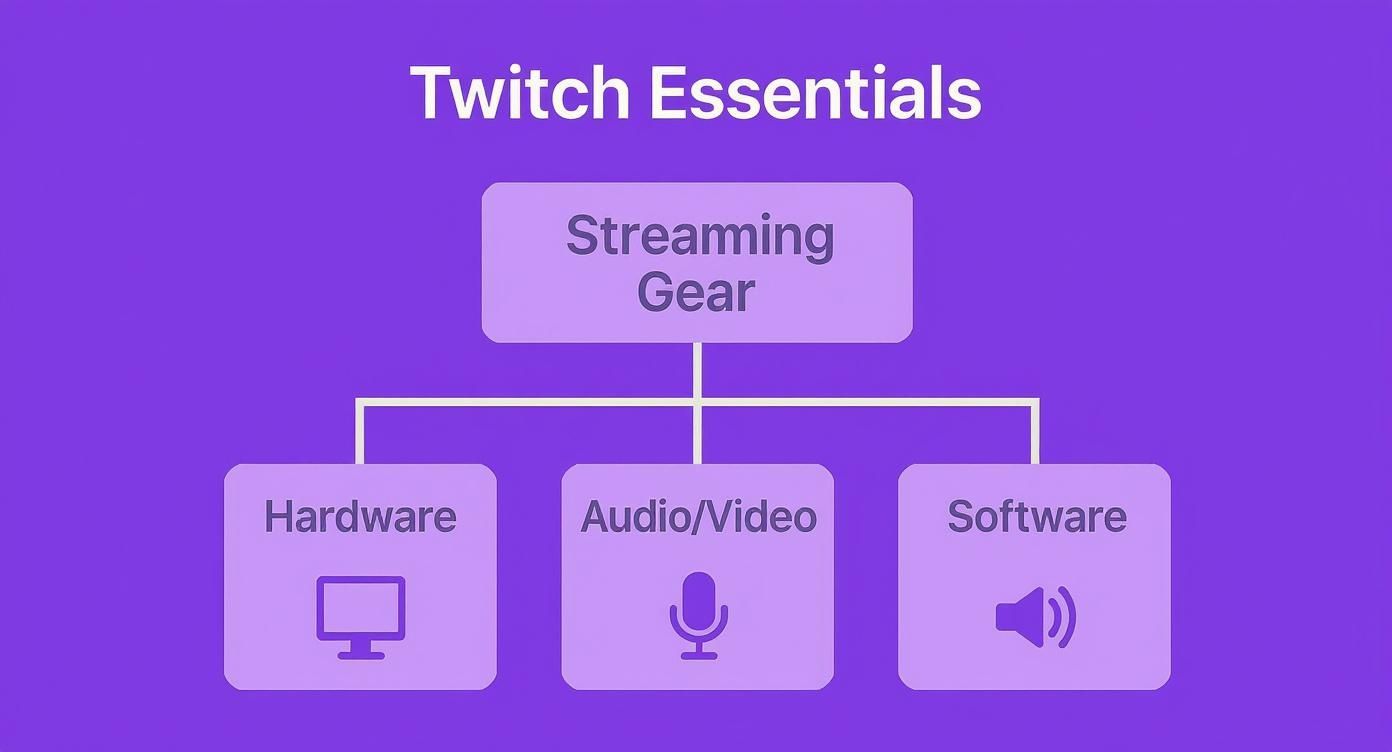
As you can see, everything builds on a solid hardware foundation. Your computer is the engine that powers your audio, video, and software choices, so it all has to work together.
Breaking Down the Core Components
Before we get into the nitty-gritty of specific gear, let's talk about the one thing that is completely non-negotiable: a stable internet connection. You'll need an upload speed of at least 5 Mbps to stream comfortably at 720p. For a crisp 1080p broadcast, you'll want to aim for 10-15 Mbps or more.
Once your internet is sorted, you'll need a decent computer or console, a quality microphone to make sure people can actually hear you, and a webcam so your audience can see your reactions. Many streamers find their footing with a solid USB microphone in the $100-$300 range, which is a massive step up from any built-in mic.
Pro Tip: Your voice is your most powerful tool for connecting with viewers. If you're on a budget, invest in a good microphone before you splurge on a fancy camera. Clear, crisp audio almost always creates a better viewing experience than a high-res camera with terrible sound.
From Beginner to Pro Level
To make things easier, we've broken down the essential gear into a simple tier list. This gives you a clear roadmap, whether you're just starting out on a shoestring budget or you're ready to build a high-end production setup.
- Minimum Tier: This is the bare-bones setup to get you live without breaking the bank.
- Recommended Tier: This is the sweet spot for growth. The gear here focuses on improving stream quality and making the experience better for your viewers.
- Pro-Level Tier: This is for serious streamers who are aiming for top-tier, professional-quality broadcasts.
Thinking in these tiers helps you decide where to put your money at each stage of your streaming journey.
Twitch Streaming Essentials Tier List
Here’s a quick-glance table to help you compare the different levels of investment for your streaming setup. It covers everything from the computer that powers your stream to the camera that puts you on screen.
| Component | Minimum (Budget Start) | Recommended (Growth) | Professional (High-Quality) |
|---|---|---|---|
| CPU | Intel Core i5-4670 or AMD equivalent | Intel Core i7-9700K or AMD Ryzen 7 3700X | Intel Core i9-12900K or AMD Ryzen 9 5950X |
| GPU | NVIDIA GeForce GTX 1650 or AMD equivalent | NVIDIA GeForce RTX 3060 or AMD RX 6700 XT | NVIDIA GeForce RTX 4080 or AMD RX 7900 XTX |
| RAM | 8 GB DDR4 | 16 GB DDR4 | 32 GB DDR5 |
| Webcam | 720p webcam (e.g., Logitech C270) | 1080p webcam (e.g., Logitech C922) | DSLR/Mirrorless camera with capture card |
| Microphone | Headset mic or budget USB mic (e.g., Blue Snowball) | Mid-range USB mic (e.g., Blue Yeti, HyperX QuadCast) | XLR microphone with audio interface |
| Software | Free software like OBS Studio | OBS Studio or Streamlabs Desktop with premium assets | OBS Studio or vMix with advanced plugins/controllers |
This table should give you a solid idea of what to aim for at each level. Don't feel pressured to jump straight to the pro column! The best streamers started with the basics and built their way up.
For a more detailed look at specific product recommendations and putting it all together, you can find a ton of info in our complete guide to the best streaming set up.
2. Nailing Down Your Internet Connection
Before you even think about cameras or microphones, let's talk about the single most important piece of the puzzle: your internet connection. We’re all conditioned to care about download speeds for Netflix or gaming, but when you're a streamer, the script gets flipped. Your upload speed is the real MVP.
Think of it this way: your stream is a constant flow of data heading out of your house to Twitch's servers. Your upload speed is the size of the pipe that data travels through. If the pipe is too small, you get a bottleneck. For your viewers, that means a pixelated, buffering nightmare. Nobody wants that.
How Fast Is Your Upload Speed, Really?
First things first, you need to know what you're working with. The best way to do that is to run a quick, free test. I always recommend using a tool like Speedtest by Ookla. Just head to the site, hit "Go," and let it work its magic.
In a few seconds, you'll get a result that looks something like this:

See that Upload Mbps number? In this example, it's 21.23 Mbps. That's the only number we care about right now. It's measured in Megabits per second (Mbps), and it tells us exactly how much data we can reliably send out to the world.
Pro Tip: Don't get distracted by a massive download number. It’s great for watching streams, but it does absolutely nothing to help you broadcast your own. It's all about that upload speed.
Finding the Sweet Spot for Your Stream Quality
Okay, so you have your number. Now what? You need to match that upload speed to the quality of the stream you want to produce. This is where your bitrate comes in—that’s simply the amount of data you're sending to Twitch every second.
Here’s a quick reference guide based on Twitch's recommendations. These are the minimum stable upload speeds you'll want to have:
- For a 720p, 30fps stream: You'll need at least 3-4 Mbps of dedicated upload speed.
- For a smoother 720p, 60fps stream: Plan for around 4.5-5.5 Mbps.
- For the crisp 1080p, 60fps experience: You’re looking at a solid 6-8 Mbps upload speed.
A golden rule I always tell new streamers is to only use about 75% of your total upload bandwidth for your stream. Why? Because your game, Discord, and other apps are also using a bit of that bandwidth. Leaving that 25% buffer prevents your stream from stuttering the moment anything else happens on your network.
If your speed test results are a little disappointing, don't panic. There are ways to fix it. You can check out some solid tips on how to improve my upload speed.
And for the love of all things stable, plug an Ethernet cable directly from your PC or console into your router. Wi-Fi is convenient, but it's also incredibly susceptible to interference. A dropped signal can kill your stream instantly. A wired connection is your best friend.
Choosing Your Streaming Machine
At the heart of any broadcast is the machine doing all the heavy lifting. When you're figuring out what you need to start streaming, your first big decision is whether to use a dedicated PC or a gaming console. Both are great ways to go live, but they're very different paths, each with its own pros and cons.
The most popular and flexible route is streaming from a PC. This setup gives you total control over every part of your broadcast, from custom visual overlays to fine-tuning your audio mix. Your PC has to be a master multitasker, juggling two very demanding jobs at once: running your game at a buttery-smooth framerate and encoding your video feed to send out to Twitch.
Streaming with a PC
Think of your PC’s main parts as a specialized team. The CPU (Central Processing Unit) is the brain of the operation, crunching all the numbers for the video encoding. The GPU (Graphics Processing Unit) is the muscle, pushing out all the gorgeous in-game visuals. And RAM (Random Access Memory) is the short-term memory, letting you run your game, your streaming software, and a dozen Chrome tabs without everything grinding to a halt.
A balanced system is what you're after. Here’s a good baseline to aim for:
- CPU: Video encoding is tough on a processor. A modern CPU with at least 6 cores—something like an Intel Core i5-12600K or an AMD Ryzen 5 5600X—is a fantastic starting point for a single-PC setup.
- GPU: Your graphics card needs enough horsepower to run your game smoothly while also lending a hand with the stream. An NVIDIA RTX 3060 or an AMD RX 6600 XT hits that sweet spot of performance and price.
- RAM: For gaming and streaming at the same time, 16 GB of RAM is pretty much the standard minimum. This is what keeps your system from getting bogged down.
If you’re dead set on squeezing out every last drop of performance, the "dual-PC" setup is the top-tier solution. With this, one PC is dedicated only to gaming, while a second PC handles all the encoding and streaming tasks. This completely separates the workloads, but it's a more complex and expensive way to go.
Streaming with a Console
Already gaming on a PlayStation or Xbox? You can be live on Twitch in just a few minutes. Both the PlayStation 5 and Xbox Series X/S have streaming features built right in, letting you broadcast directly to your channel with a few button presses. It’s easily the simplest and most budget-friendly way to get started.
The biggest win for console streaming is its sheer simplicity. You don't have to mess with complicated software or manage extra hardware. Just link your Twitch account from the console's dashboard and you're good to go.
That convenience, however, comes with some trade-offs. You get very little say in how your stream actually looks. Custom overlays, follower alerts, and different scenes—all the little things that give a stream a polished, unique vibe—are mostly off the table when you stream straight from the console.
To get around this, many console streamers add a capture card to their setup. This handy little device sits between your console and a PC. It captures the video and audio from your console and sends it over to the computer, where you can use powerful software like OBS Studio to add all those professional touches. It's truly the best of both worlds.
Finding the Right Audio and Video Gear
Alright, your computer is ready to rock. Now it’s time to think about what your audience will actually see and hear. Your microphone and camera are your direct line to your viewers, and frankly, they can make or break your stream. Even the most incredible gameplay moments fall flat with scratchy audio or a webcam that looks like it's filming through a potato.
Here's a hard truth of streaming: great audio is non-negotiable. If your audience has to strain to hear you, or if your mic is full of static, they'll just click away. This is one area where a small investment pays off big time.
Your Voice Is Your Brand
When it comes to microphones, you'll generally find yourself choosing between two main types: USB and XLR. Getting your head around the difference is the first step to sounding great.
A USB microphone is the very definition of plug-and-play. You just plug it into a spare USB port, your computer recognizes it, and you're good to go. They’re a fantastic all-in-one solution and a huge step up from any gaming headset mic, which is why they're so popular with new and established streamers alike.
On the other hand, an XLR microphone is what you’ll find in a professional recording studio. These mics connect to your PC through a separate piece of gear called an audio interface. This setup gives you far more control and pristine sound quality, but it also comes with a higher price tag and a bit of a learning curve.
For most streamers just starting out, a quality USB mic is the sweet spot. It delivers crisp, clear audio that will instantly make your stream sound more professional, all without the extra complexity and cost of an XLR setup.
Getting the Perfect Shot
With your audio dialed in, let's talk about video. Your camera puts a face to your voice and is a huge part of building a real connection with your community. But when you’re shopping for a webcam, don't get hung up on just the resolution, like 1080p.
For streaming, frame rate is often more important. A camera that can broadcast at 60 frames per second (fps) will look incredibly smooth and lifelike, especially when you're playing a fast-paced game. It helps your video match the fluid motion of your gameplay, creating a much more polished and cohesive viewing experience than a standard 30fps camera.
Here’s a quick breakdown of your options:
- Budget Webcams: A solid 720p or 1080p webcam that runs at 30fps is a perfectly fine place to start.
- Mid-Range Webcams: This is where you'll find cameras that offer 1080p at 60fps. The jump in quality is immediately noticeable.
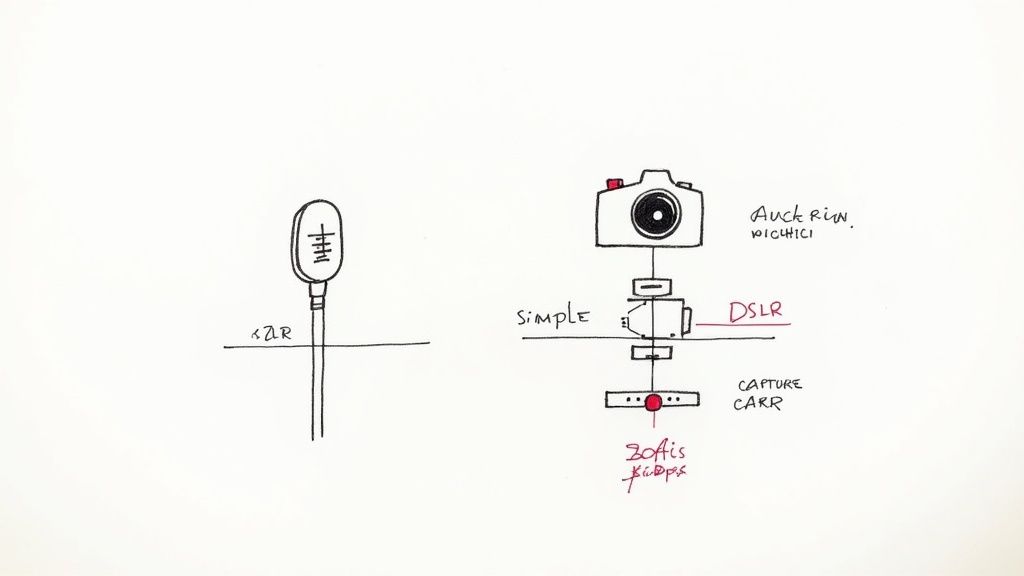
- DSLR/Mirrorless Cameras: If you want that buttery-smooth, professional look with a blurry background, you can connect a high-end camera to your PC with a capture card. The quality is unmatched, but it's a serious investment.
To help you decide what fits your needs and wallet, here's a quick comparison of some popular options.
Audio & Video Gear Recommendations by Budget
| Budget Level | Microphone Type & Example | Webcam/Camera Type & Example |
|---|---|---|
| Starter | USB Condenser - Blue Yeti, Razer Seiren Mini | 1080p/30fps Webcam - Logitech C920, Razer Kiyo |
| Mid-Tier | Premium USB - Elgato Wave:3, Rode NT-USB+ | 1080p/60fps Webcam - Logitech StreamCam, Elgato Facecam |
| Pro | XLR Dynamic/Condenser - Shure SM7B, Rode Procaster (requires audio interface) | Mirrorless/DSLR Camera - Sony ZV-E10, Canon M50 (requires capture card) |
Remember, you don't need to jump straight to the pro-level gear. Starting with solid, reliable equipment in the starter or mid-tier range will give you fantastic quality as you grow your channel.
Let There Be Light
Finally, let’s talk about the secret weapon for making any camera look amazing: good lighting. You could have the most expensive camera on the market, but in a dim, poorly lit room, it will still look grainy.
You don't need a Hollywood budget to fix this. A simple three-point lighting setup can completely transform your video quality. It’s a classic technique for a reason.
Here’s how it works:
- Key Light: This is your main, brightest light. Place it off to one side of your camera, aimed at your face.
- Fill Light: This is a softer, less intense light placed on the opposite side to soften the shadows created by the key light.
- Back Light: Placed behind you and often aimed at your head and shoulders, this light helps separate you from your background, creating a sense of depth.
Seriously, even a couple of cheap desk lamps with a white t-shirt or some parchment paper taped over them for diffusion can make a world of difference. Good lighting makes your camera’s job easier and is the single most effective way to boost your video quality.
Choosing Your Streaming Software
Think of your streaming software as the director's booth for your live show. It's the central hub where you pull together your gameplay, your camera feed, your microphone audio, and all your cool graphics like overlays and alerts. This software is what takes all those separate pieces and mixes them into a single, polished broadcast that you send out to Twitch.
It's the magic behind turning a simple screen capture into an actual, engaging stream.
The Go-To Choice: OBS Studio
The undisputed champion in this arena is OBS Studio. It’s powerful, completely free, and open-source, which is exactly why it’s become the gold standard for streamers everywhere. The whole system is built around two simple ideas: scenes and sources.
A source is any single thing you want to show on screen—your game, webcam, a logo, a line of text, you name it. A scene is just a collection of those sources arranged how you want them. You might have a "Live Gameplay" scene, a "Be Right Back" scene, and an "Intro" scene, all ready to go.
Here's a look at the OBS interface, where you can see the scene and source docks at the bottom.
This setup lets you flip between different layouts instantly, making your stream feel dynamic and professional instead of static.
Looking for a Simpler Start?
While OBS gives you ultimate control, it can feel a little intimidating if you're just starting out. That's where alternatives like Streamlabs Desktop come in. It’s built on the same foundation as OBS but wraps it in a much more beginner-friendly package.
Streamlabs offers a guided setup, built-in themes for overlays and alerts, and an integrated chat window, which really helps smooth out that initial learning curve.
Another route, especially if you're on a console or your PC isn't a powerhouse, is to use a browser-based studio. Tools like Lightstream do all the heavy lifting in the cloud. Your computer just sends the raw game feed to their servers, and they handle the hard work of encoding and adding your graphics. This frees up your PC's resources to focus on running your game smoothly.
If you want to dig deeper, you can explore more great options in our guide to the best free live streaming software.
A Quick Word on Your Encoder
Inside your software, you'll find a crucial setting called the encoder. This is the component responsible for compressing your video into a format that can be efficiently sent over the internet to Twitch. You'll generally have two choices:
- x264 (CPU Encoding): This method uses your computer's main processor (CPU) to do the work. It can produce fantastic quality, but it's very demanding. If your CPU is struggling, your game performance can take a serious hit.
- NVENC (GPU Encoding): If you have a modern NVIDIA graphics card, you can use a special, dedicated chip on the card itself for encoding. This has a tiny impact on your gaming performance, making it the go-to choice for almost every streamer with a compatible GPU.
For most people, the decision is easy. Using NVENC (or the AMD equivalent, AMF/VCN) is the best way to ensure your game stays buttery-smooth while you're live.
Alright, you’ve got the hardware dialed in. Now for the fun part: making your stream look like your stream. This is all about your on-screen brand—the visual identity that turns a basic gameplay feed into a full-fledged, professional-looking show. It's what makes your channel memorable and keeps people coming back for more.
The building blocks of your on-screen brand are your stream assets. Think of these as the set design for your broadcast. We're talking about the custom graphics that create a consistent, polished look, like the overlays that frame your game and webcam, or the fun alerts that pop up when someone follows or subscribes.
Creating a Cohesive Experience
A really great stream feels dynamic, not like you're just staring at one static screen for hours. The secret to this is using different scenes for different moments in your broadcast. You wouldn't just jump into the middle of a movie, right? There's an intro, the main event, and an ending. Your stream should follow that same logic.
At a minimum, you'll want to set up a few key scenes:
- Starting Soon: A great way to build some hype before you go live. This could be a countdown timer or a cool looping animation.
- Live Gameplay: This is your main event scene, where your game, webcam, and overlays are all perfectly arranged.
- Be Right Back (BRB): A simple screen to flip to when you need to grab a drink or answer the door. It's way more professional than an empty chair.
- Stream Ending: A dedicated outro screen. This is perfect for thanking your viewers, shouting out new followers, and getting ready to raid another creator.
Jumping between these scenes creates a flow that makes your stream feel like a real production. And don't worry, you don't need to be a graphic design wizard to pull this off. Services like StreamElements offer fantastic, free packages that are a breeze to set up. If you want something more premium, sites like Nerd or Die have some seriously professional designs.
Your on-stream graphics do more than just look cool—they create a recognizable brand. When a viewer sees your unique colors and logo, they instantly know whose stream they’re watching, which is crucial for building a loyal community.
As your channel grows, this polished branding becomes incredibly important, especially when it comes to securing brand deals and sponsorships. A professional look makes your channel far more attractive to potential partners.
With nearly 7.3 million streamers going live on Twitch every month, a strong, unique brand is what will help you cut through the noise. The huge popularity of categories like 'Just Chatting' proves that personal connection is king, and interactive, branded elements just amplify that connection. If you're curious about the data, you can see how viewer habits shape streamer success and get a better feel for the trends.
Got a Few Lingering Questions?
Alright, you've got the gear, the software is installed, and you’re almost ready to hit that big "Go Live" button. It’s totally normal to have a few last-minute questions bubbling up. Let's walk through some of the most common ones I hear from new streamers to clear up any final uncertainties.
What’s the Real-World Cost to Get Started?
Honestly? You can start this journey for exactly $0. If you have a modern console or a basic PC, you can use built-in broadcasting features or free software like OBS Studio and be live in minutes.
But if you're looking for that first big quality jump, a budget of around $150-$200 works wonders. That's enough to snag a solid USB microphone and a good 1080p webcam. Those two pieces of gear will make the single biggest difference in how your stream looks and sounds to a new viewer.
Do I Really Need to Pick a "Niche"?
Need to? No. But should you? Absolutely. Trying to be a "variety streamer" who plays a different game every day is incredibly tough when you're starting out.
Focusing on a specific game, a genre you love, or a unique style of content gives people a reason to find you and, more importantly, a reason to come back. It's the fastest way to build a core community of people who are there for you and what you do.
How Do I Get My First Handful of Viewers?
Getting from zero to one viewer is the hardest part! The first step is simple: tell your friends. Drop your stream link on your social media and let people in your existing circle know what you're up to.
Beyond that, the best thing you can do is become part of the community you want to build. Hang out in other streams (in your niche!), be a positive and active chatter, and make genuine connections. And of course, set a consistent schedule. Even if it's just two days a week, letting people know when you'll be live is a game-changer.
Ready to create polished, professional streams without the live-day stress? With Pre-recorded LiveStream, you can perfect your content in advance and broadcast it flawlessly to Twitch, YouTube, and more. Upload your video, schedule a time, and let our cloud platform handle the rest. Start streaming smarter, not harder, today.